Introduction
Most WordPress login problems are surprisingly common and completely fixable.
In this guide, we’ll walk you through 9 proven solutions to diagnose the issue and get you safely back into your admin dashboard.
In a Hurry? Try These Quick Fixes First (TL;DR)
This is the #1 fix for a reason. Before you try anything else, use the “Lost your password?” link on your login page to get a reset link via email. If that doesn’t work or you can’t access your email, you can always reset it manually using phpMyAdmin from your hosting dashboard.
Is the login page just refreshing or redirecting you in a loop? Your browser is likely stuck on old data. Clearing its cache and cookies forces it to load a fresh version of your site and often resolves the issue instantly.
A faulty or conflicting plugin often causes the dreaded ‘White Screen of Death’ or other errors that block your login page. The fastest way to diagnose this is to temporarily disable all your plugins at once via FTP or your hosting File Manager. If you can log in after that, you’ve found the culprit.
Why Can’t I Log In To WordPress? Common Causes
- Incorrect Username or Password: The simplest cause. A small typo or having Caps Lock on is often the only thing standing in your way. You’ll typically see a clear “Incorrect Password” error.
- Browser Cookie or Cache Issues: Your browser might be stubbornly holding onto old, invalid data. This is the most likely reason if your login page just keeps refreshing in a loop.
- Plugin or Theme Conflicts: A recently updated or faulty plugin/theme is a primary offender. This conflict often triggers the infamous ‘White Screen of Death,’ leaving you with a completely blank page. Alternatively, it might display a page of PHP errors where your login form should be.
- Corrupted Core Files: Essential files like .htaccess (which handles your site’s URLs) or
wp-config.php(which connects to your database) can get damaged. A corrupt .htaccess file is another common cause for the redirecting login page.
- Incorrect WordPress Address (URL): If your website address is incorrect in the settings, WordPress can get confused and trap you in a redirect loop.
- Exhausted PHP Memory Limit: When a script demands more server memory than is available, your site essentially freezes. This crash often appears as the ‘White Screen of Death‘ on your login page.
- Database Connection Error: You’ll see a page that explicitly says, “Error Establishing a Database Connection.” This means your website simply can’t talk to its database, which stores all your user data
9 Step-by-Step Solutions to Fix Your WordPress Login
1. Check Your Credentials & Reset Your Password
Method A: Use the “Lost Your Password?” Link
1. Navigate to your WordPress login page, usually found at yoursite.com/wp-admin.
2. Click on the “Lost your password?” link located just below the login form.

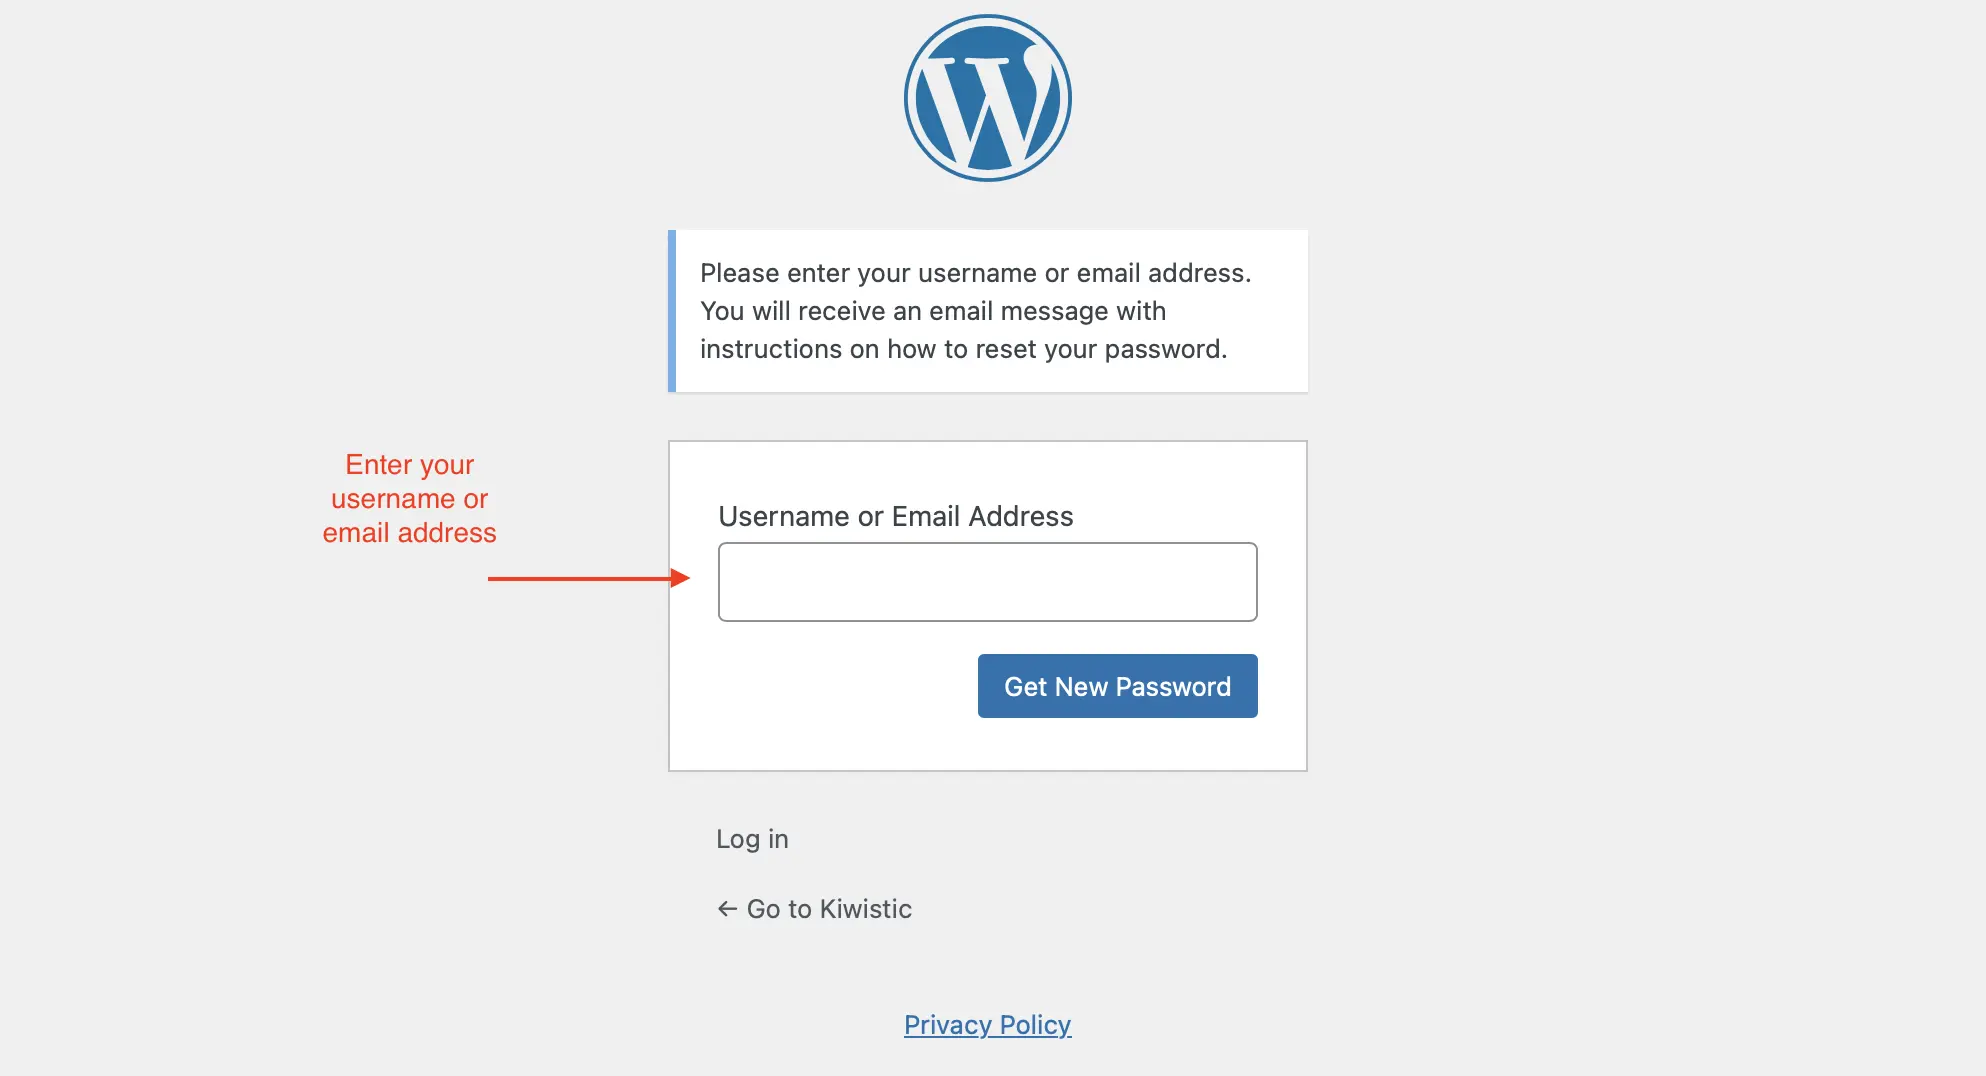
3. On the next page, enter the username or email address for your admin account and click “Get New Password.”
4. WordPress will send a password reset link to your registered email. Check your inbox (and spam folder, just in case).
5. Follow the link from the email to create a new, strong password, and you’re back in!
Method B: Manually Reset Your Password via phpMyAdmin
If the standard email reset fails or you can’t access that inbox, there’s another reliable method. You’ll need to reset your password directly in the WordPress database.
This sounds technical, but if you follow these steps carefully, it’s a reliable fix.
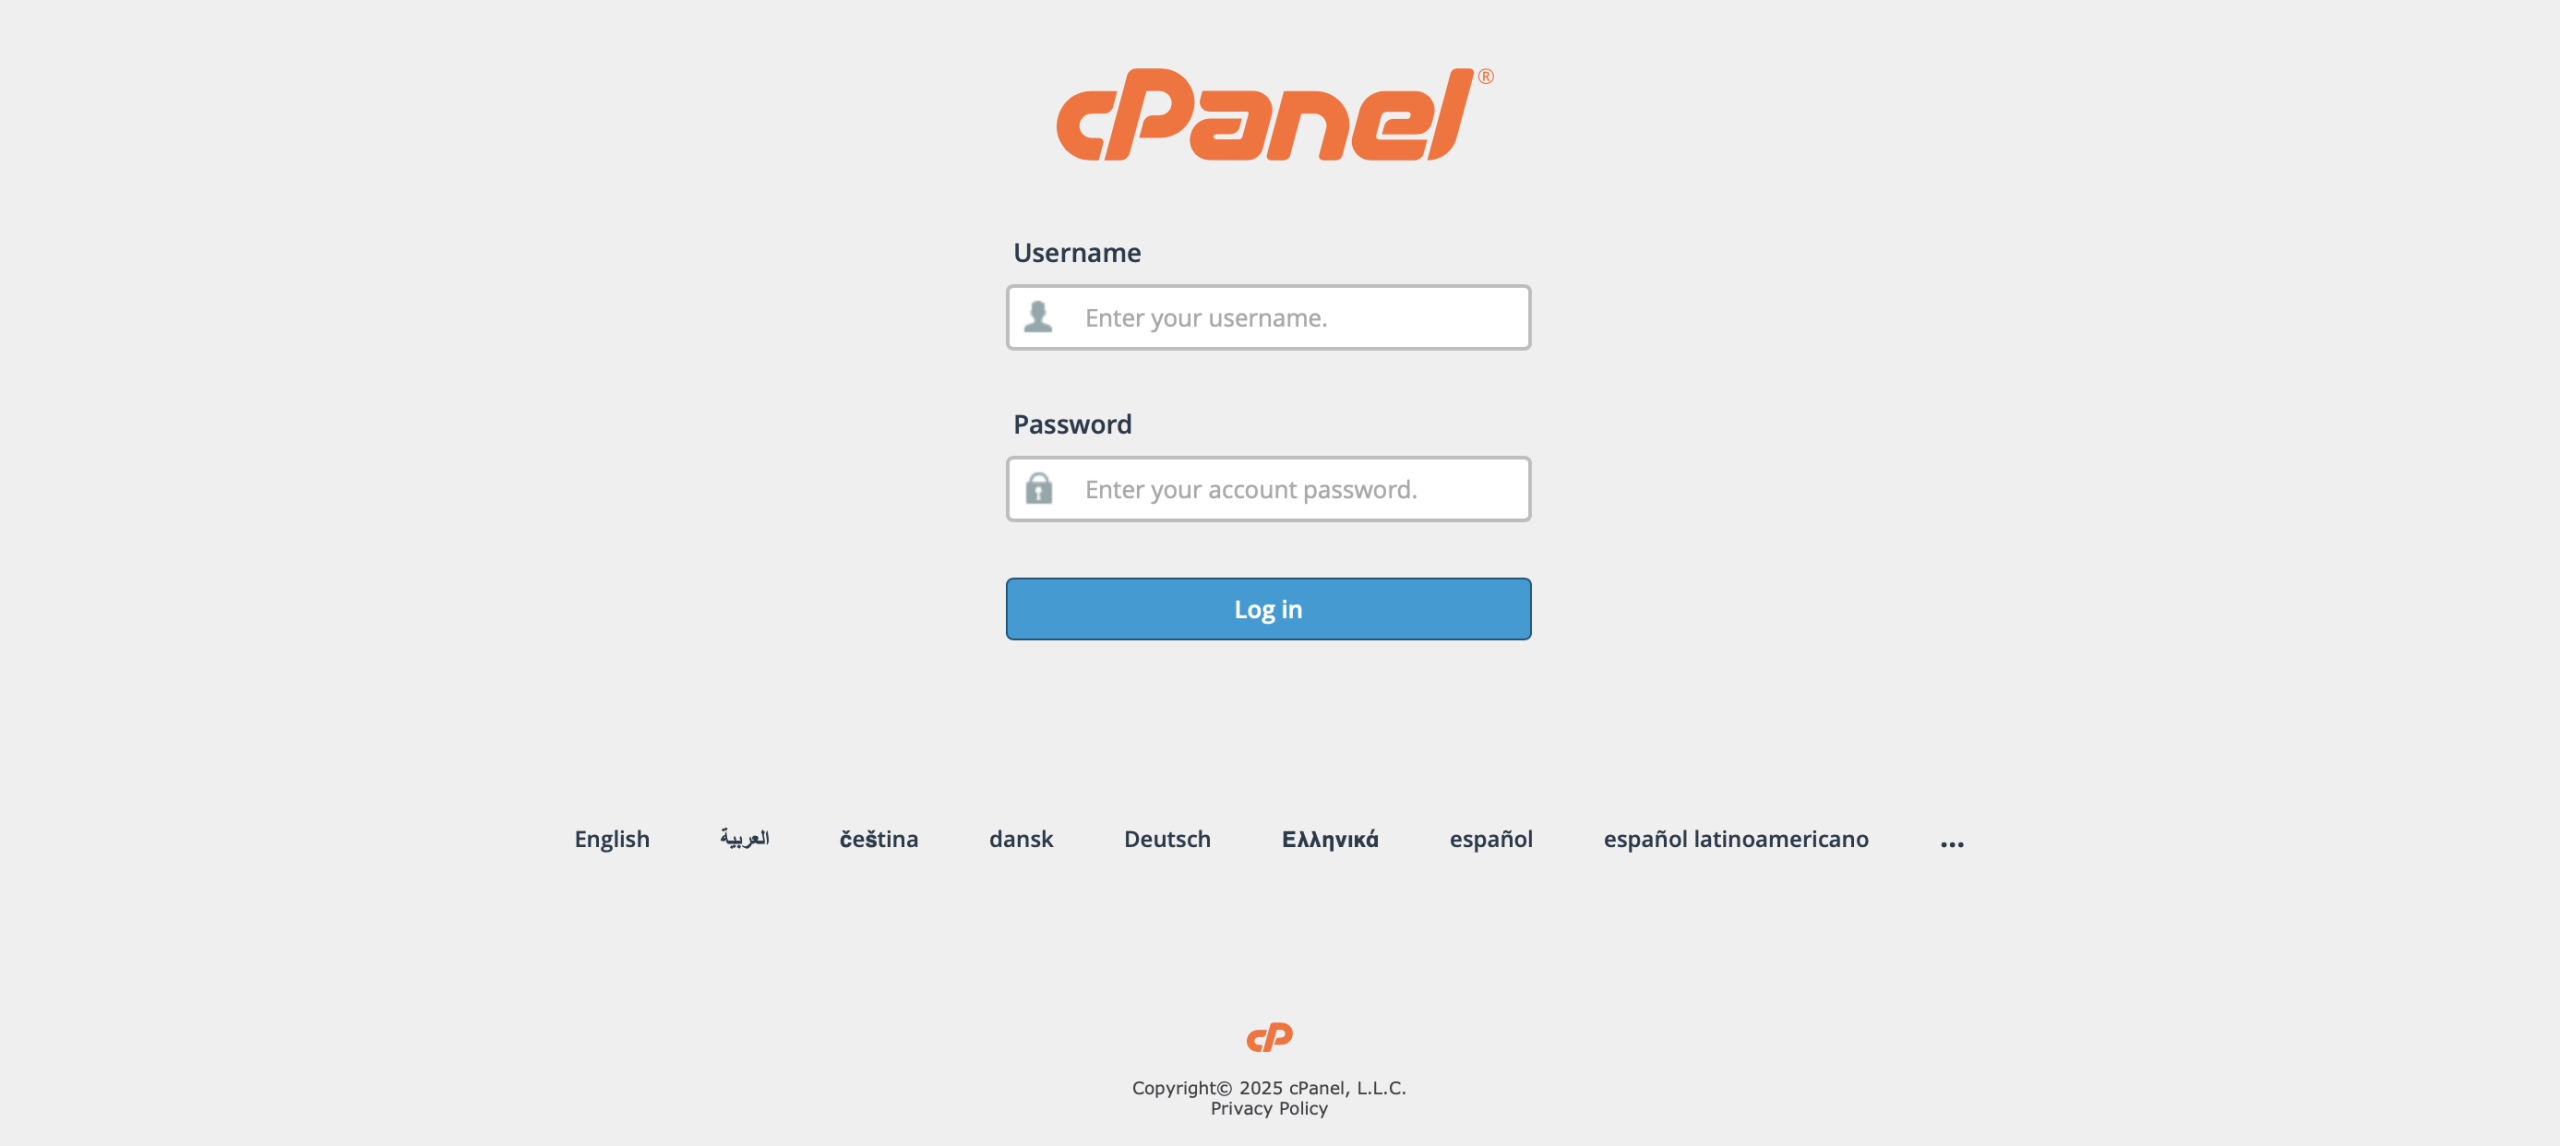
1. Log in to your website’s hosting control panel (like cPanel, Plesk, or a custom host dashboard). The login page is yoursite.com/cpanel or yoursite.com:2083
2. Find and click on the phpMyAdmin icon, which is located in the “Databases” section.

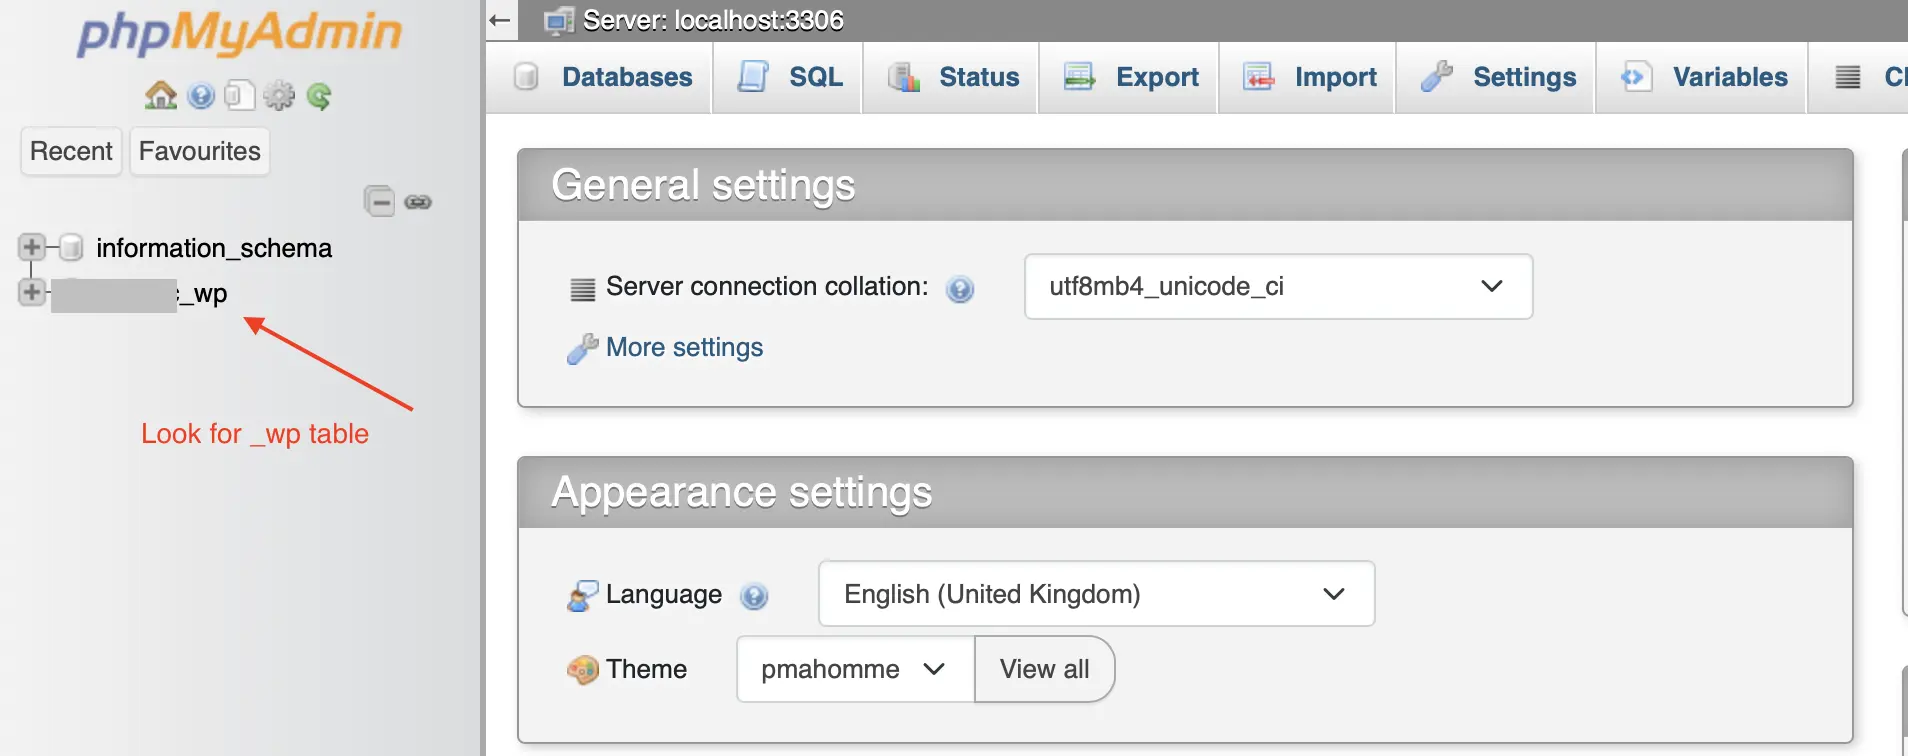
3. Once inside phpMyAdmin, select your WordPress database from the list on the left. (If you have multiple, it’s usually the one containing wp_ in its name).
4. Find the wp_users table in the list of tables and click on it. (Note: Your table prefix might be different from wp_).

5. Locate your admin username in the list and click the “Edit” link on that row.

6. You will see a form with all your user information. Find the row for user_pass.
7. In the Value column for the user_pass row, first delete all the existing encrypted text. Then, type your new password into the now-empty box.

8. This is the most important step: In the Function column for that same row, click the dropdown menu and select MD5. This step is essential because WordPress can only recognize passwords that are in this specific format.
9. Scroll to the bottom of the page and click the “Go” button to save your changes. You can now log in to your site with your new password.

2. Clear Your Browser’s Cache and Cookies
A Quick Test First
- Try Incognito/Private Mode: Open a new incognito (Chrome) or private (Firefox) window and try to log in. This mode doesn’t use the browser’s stored cache or cookies.
- Use a Different Browser: If you normally use Chrome, try logging in with Firefox or Safari.
How to Clear Cache in Google Chrome
1. Click the three-dot menu icon in the top-right corner.
2. Go to Settings > Privacy and security.

3. Go to Delete browsing data.
4. In the pop-up window, select the Basic tab.
5. Set the “Time range” to All time.
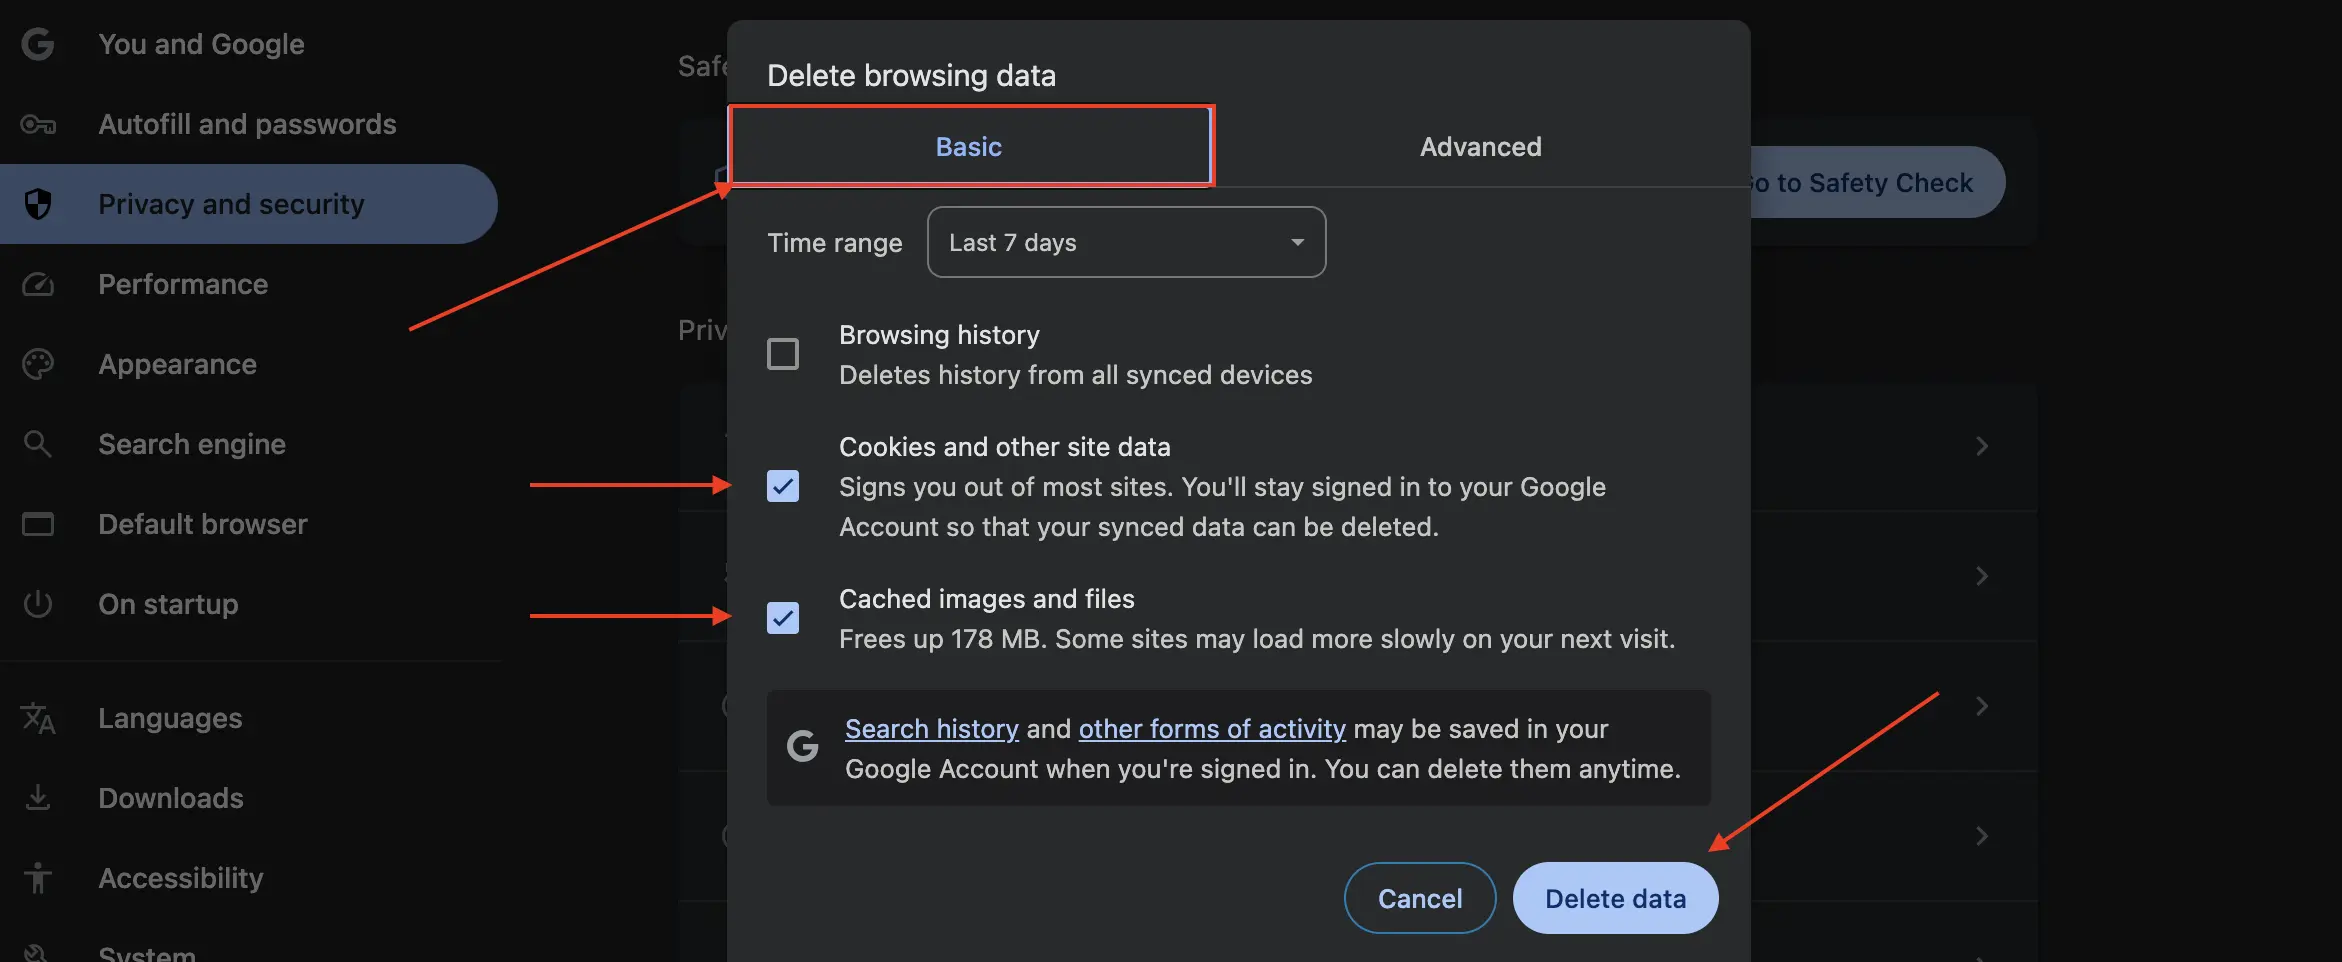
6. Check the boxes for “Cookies and other site data” and “Cached images and files.” You can uncheck everything else.
7. Click the “Delete data” button.
How to Clear Cache in Mozilla Firefox
1. Click the three-line menu icon (the “hamburger” menu) in the top-right corner.
2. Go to Settings.
3. Select the Privacy & Security panel on the left.
4. Scroll down to the “Cookies and Site Data” section and click “Clear Data…“.
5. Ensure you have checked the boxes for both “Cookies and Site Data” and “Cached Web Content.”
6. Click the “Clear” button.
3. Rule Out Plugin Conflicts (The Safe Way)
We will do this by renaming the main plugins folder. You can use either an FTP client (like FileZilla) or the File Manager in your hosting control panel.
How to Deactivate All Plugins via FTP or File Manager
1.Connect to Your Server: Open your FTP client and connect to your website’s server using your FTP credentials. Alternatively, log into your hosting account and open the File Manager.
2. Navigate to the wp-content Folder: Your WordPress files are typically located in a folder named public_html or named after your domain. Inside that, find and open the wp-content folder.
3. Find the plugins Folder: Inside wp-content, you will see the plugins folder. This folder contains all the plugins installed on your site.
4. Rename the Folder: Right-click on the plugins folder and choose the “Rename” option. Rename it to something memorable, like plugins_deactivated or plugins_old.
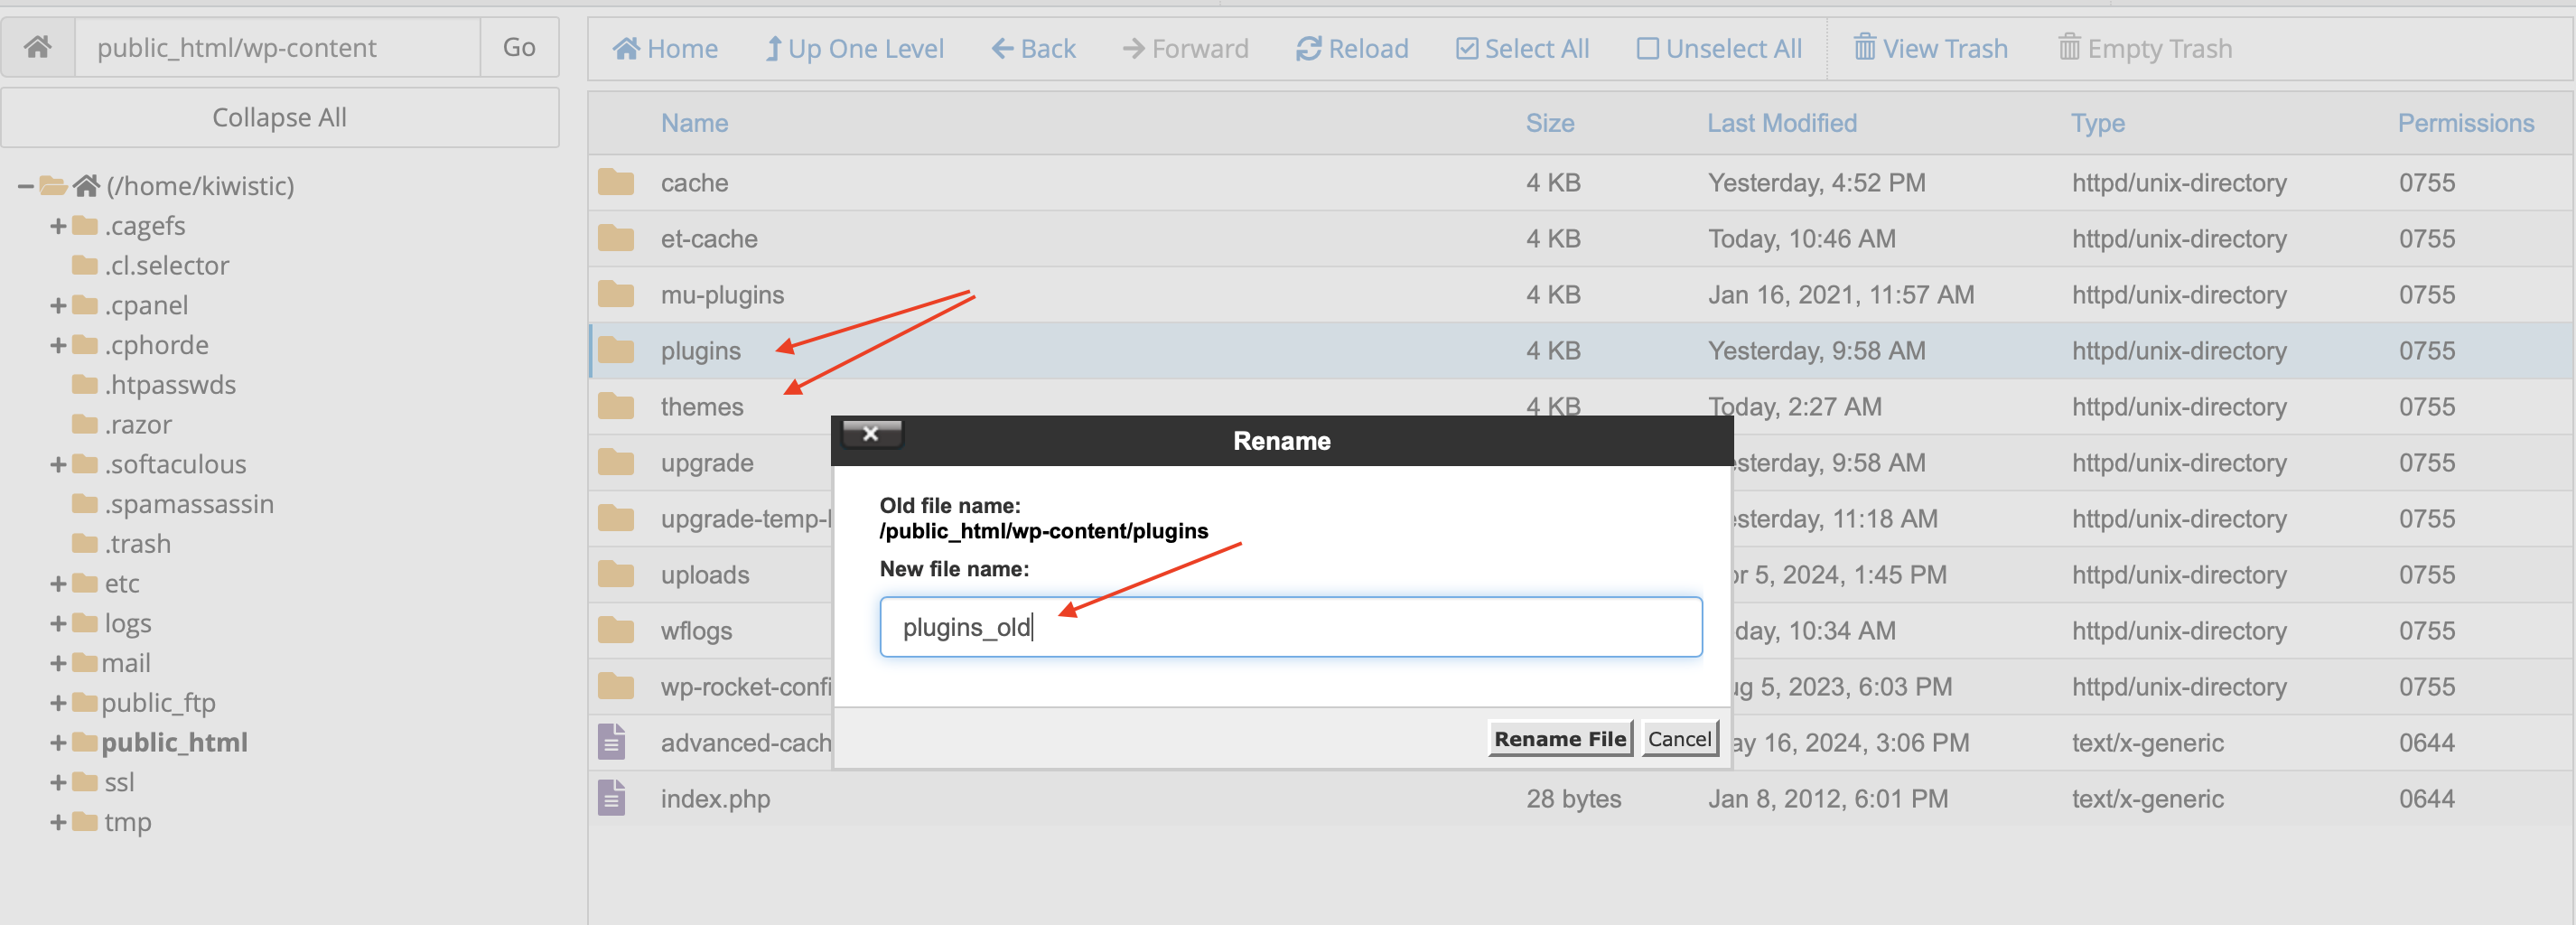
(This action is completely safe and reversible. By renaming the folder, WordPress can no longer find your plugins and will automatically disable all of them.)
5. Try Logging In Again: Now, open a new browser window and try to access your WordPress login page. If you can now log in, that confirms a plugin conflict was the problem.
What to Do Next: Finding the Faulty Plugin
1. Go back to your FTP client or File Manager.
2. Rename the plugins_deactivated folder back to its original name: plugins.
3. In your WordPress dashboard, navigate to the Plugins > Installed Plugins page. You will find all your plugins listed here, but you’ll notice they are now all deactivated. This is exactly what should happen.
4. Activate them one by one. After activating each plugin, refresh your site or try opening the login page in a private browser window.
5. When the login error or White Screen of Death returns, you’ve found the culprit—it was the last plugin you activated.
6. To fix it, go back to your FTP/File Manager, navigate to wp-content/plugins, and delete that specific plugin’s folder.
4. Switch to a Default WordPress Theme
Note: You must have a default WordPress theme already installed on your site for this to work (e.g., “Twenty Twenty-Four,” “Twenty Twenty-Five”). If you don’t, you can download one from WordPress.org and upload its folder to your themes directory before you begin.
How to Revert to a Default Theme via FTP
1. Connect to Your Server: Log in to your site using an FTP client or your hosting provider’s File Manager.
2. Navigate to the themes Folder: Go to the wp-content directory. Inside, find and open the themes folder.
3. Rename Your Active Theme’s Folder: You will see folders for each theme you have installed. Find the folder for your currently active theme. Right-click on it and choose “Rename.”

4. Rename the folder to something like themename_deactivated. For example, if your theme is Divi, rename it to Divi_deactivated.
(This action tells WordPress it can no longer find your active theme. It will then automatically fall back to the most recent default theme it can find.)
5. Try to Log In: Go back to your browser and try accessing your wp-admin login page.
5. Fix a Corrupted .htaccess File
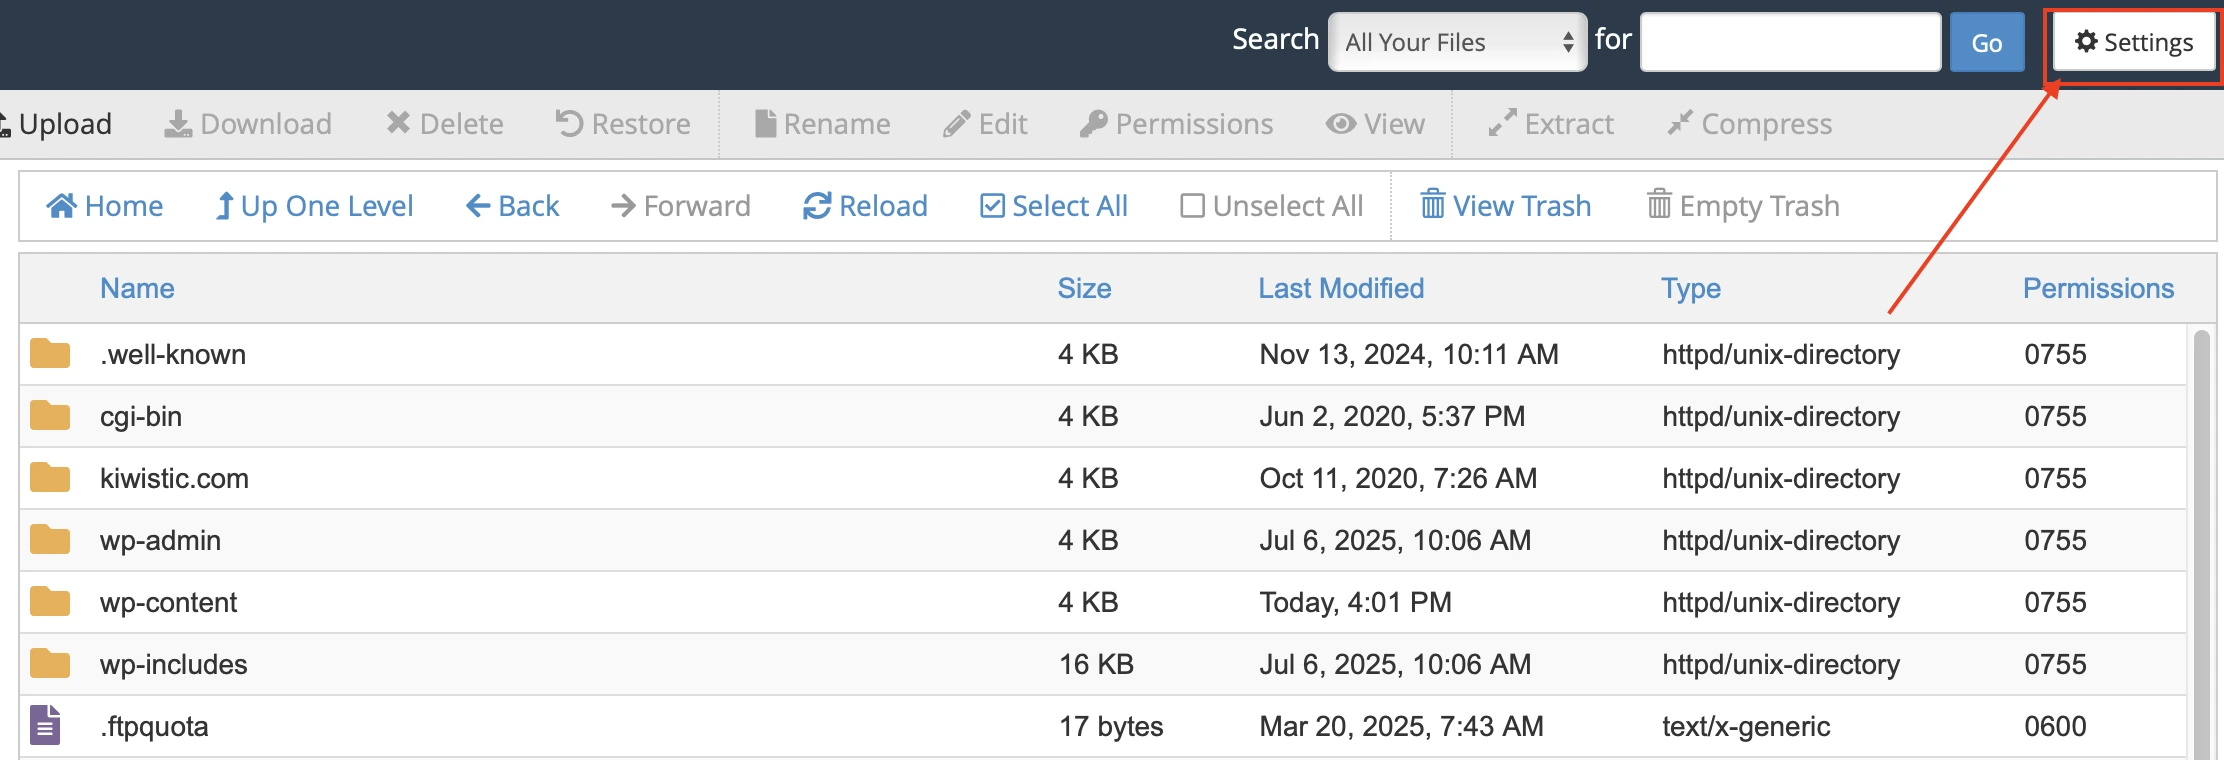
Note: The .htaccess file is often a hidden file. If you are using an FTP client like FileZilla, you may need to enable the option to “Show hidden files” to see it. In most hosting File Managers, they are visible by default.

How to Reset Your .htaccess File
1. Connect to Your Server: Log in to your website’s server using an FTP client or your hosting’s File Manager.
2. Locate the .htaccess File: Navigate to the root directory of your WordPress installation. This is the same folder that contains your wp-config.php file and the wp-content and wp-admin folders.
You should see the .htaccess file here.
3. Rename the File: Right-click on the .htaccess file and choose “Rename.” Change the name to .htaccess_old. This effectively deactivates the file without deleting it, making it easy to restore if needed.

4. Try Logging In: Open your browser and attempt to log in to your WordPress admin dashboard.
Generate a New .htaccess File
1. Go to Settings > Permalinks.
2. Do not change any settings. Simply scroll to the bottom of the page and click the “Save Changes” button.
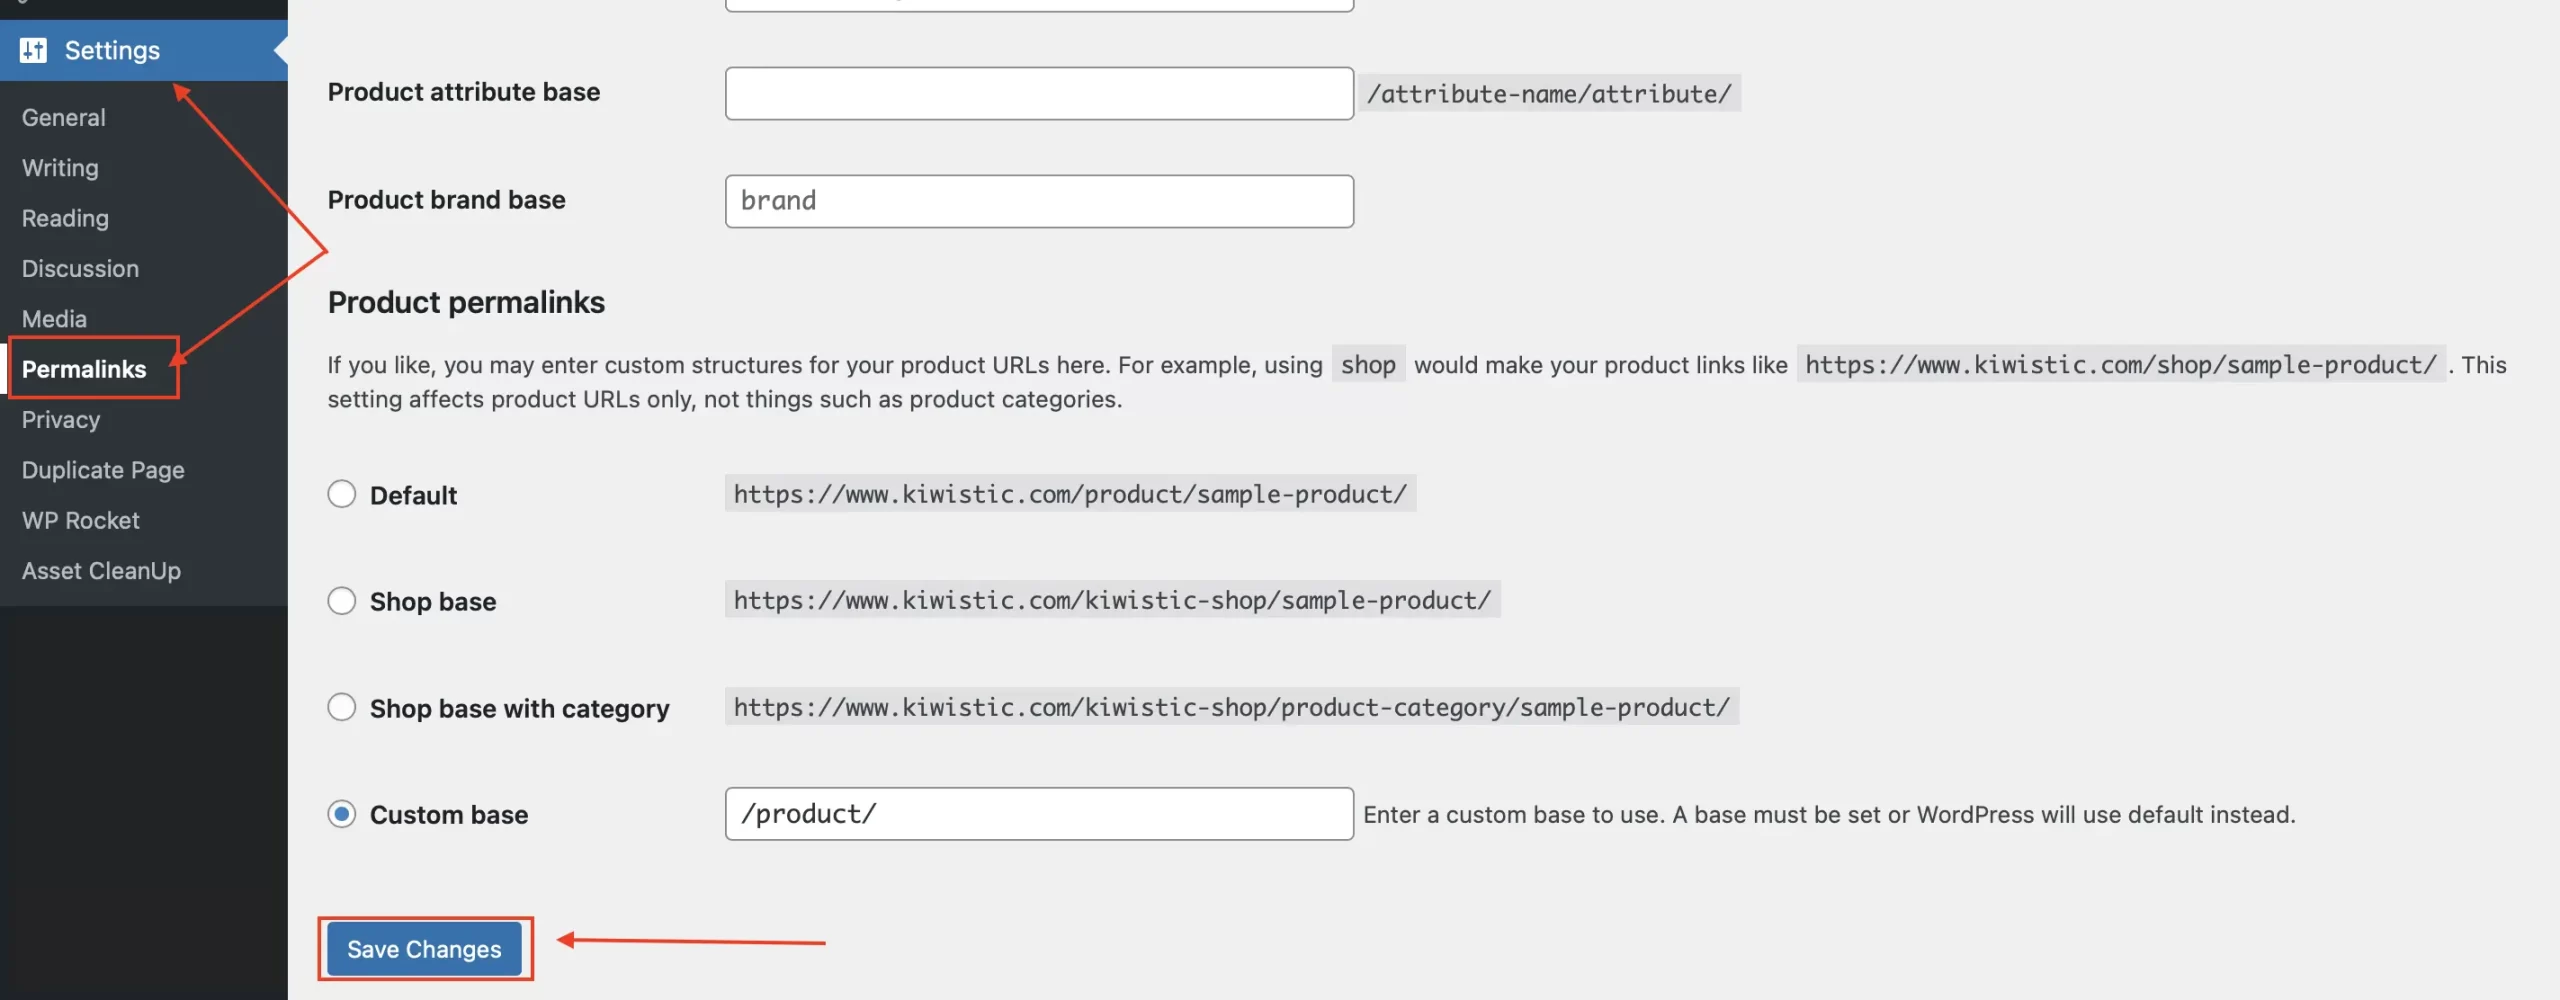
This automatically generates a fresh .htaccess file and restores your site’s correct URL structure. And that’s it. You’ve successfully fixed the login issue.
7. Repair a Corrupted wp-login.php File
Your login page is generated by a core file called wp-login.php. If this file becomes corrupted, it will prevent the login page from loading entirely.
How to Replace Your wp-login.php File
1. Download a Fresh Copy of WordPress: Go to the official WordPress.org download page. Download the latest version as a .zip file.
- Pro-Tip: For best results, try to match the version of WordPress you are currently running. If you’re unsure of your version, you can often find it by checking the readme.html file in your site’s root directory via FTP. You can find older versions in the WordPress Release Archive.

2. Unzip the File on Your Computer: Once the download is complete, unzip the file. This will create a folder named wordpress on your computer.
3. Locate the Clean File: Open the wordpress folder. Inside, you will see the wp-login.php file in the main list of files. This is your clean copy.
4. Connect to Your Server: Using an FTP client or your hosting provider’s File Manager, connect to your website’s server.
5. Upload and Overwrite: Navigate to your site’s root directory—this is the main folder that contains your wp-config.php file.
Upload the clean wp-login.php file from your computer into this directory. Your program will ask if you want to overwrite the existing file. Confirm this action.
8. Increase Your PHP Memory Limit
When your website runs out of memory, it often crashes and displays the dreaded ‘White Screen of Death‘ on the login page. Think of it like a computer trying to run a demanding program without enough RAM—it just freezes.
This problem has a technical name: PHP memory exhaustion. A demanding plugin or theme is usually the cause.
How to Verify Your Database Credentials
1. Connect to Your Server: Access your website’s files using an FTP client or the File Manager in your hosting panel.
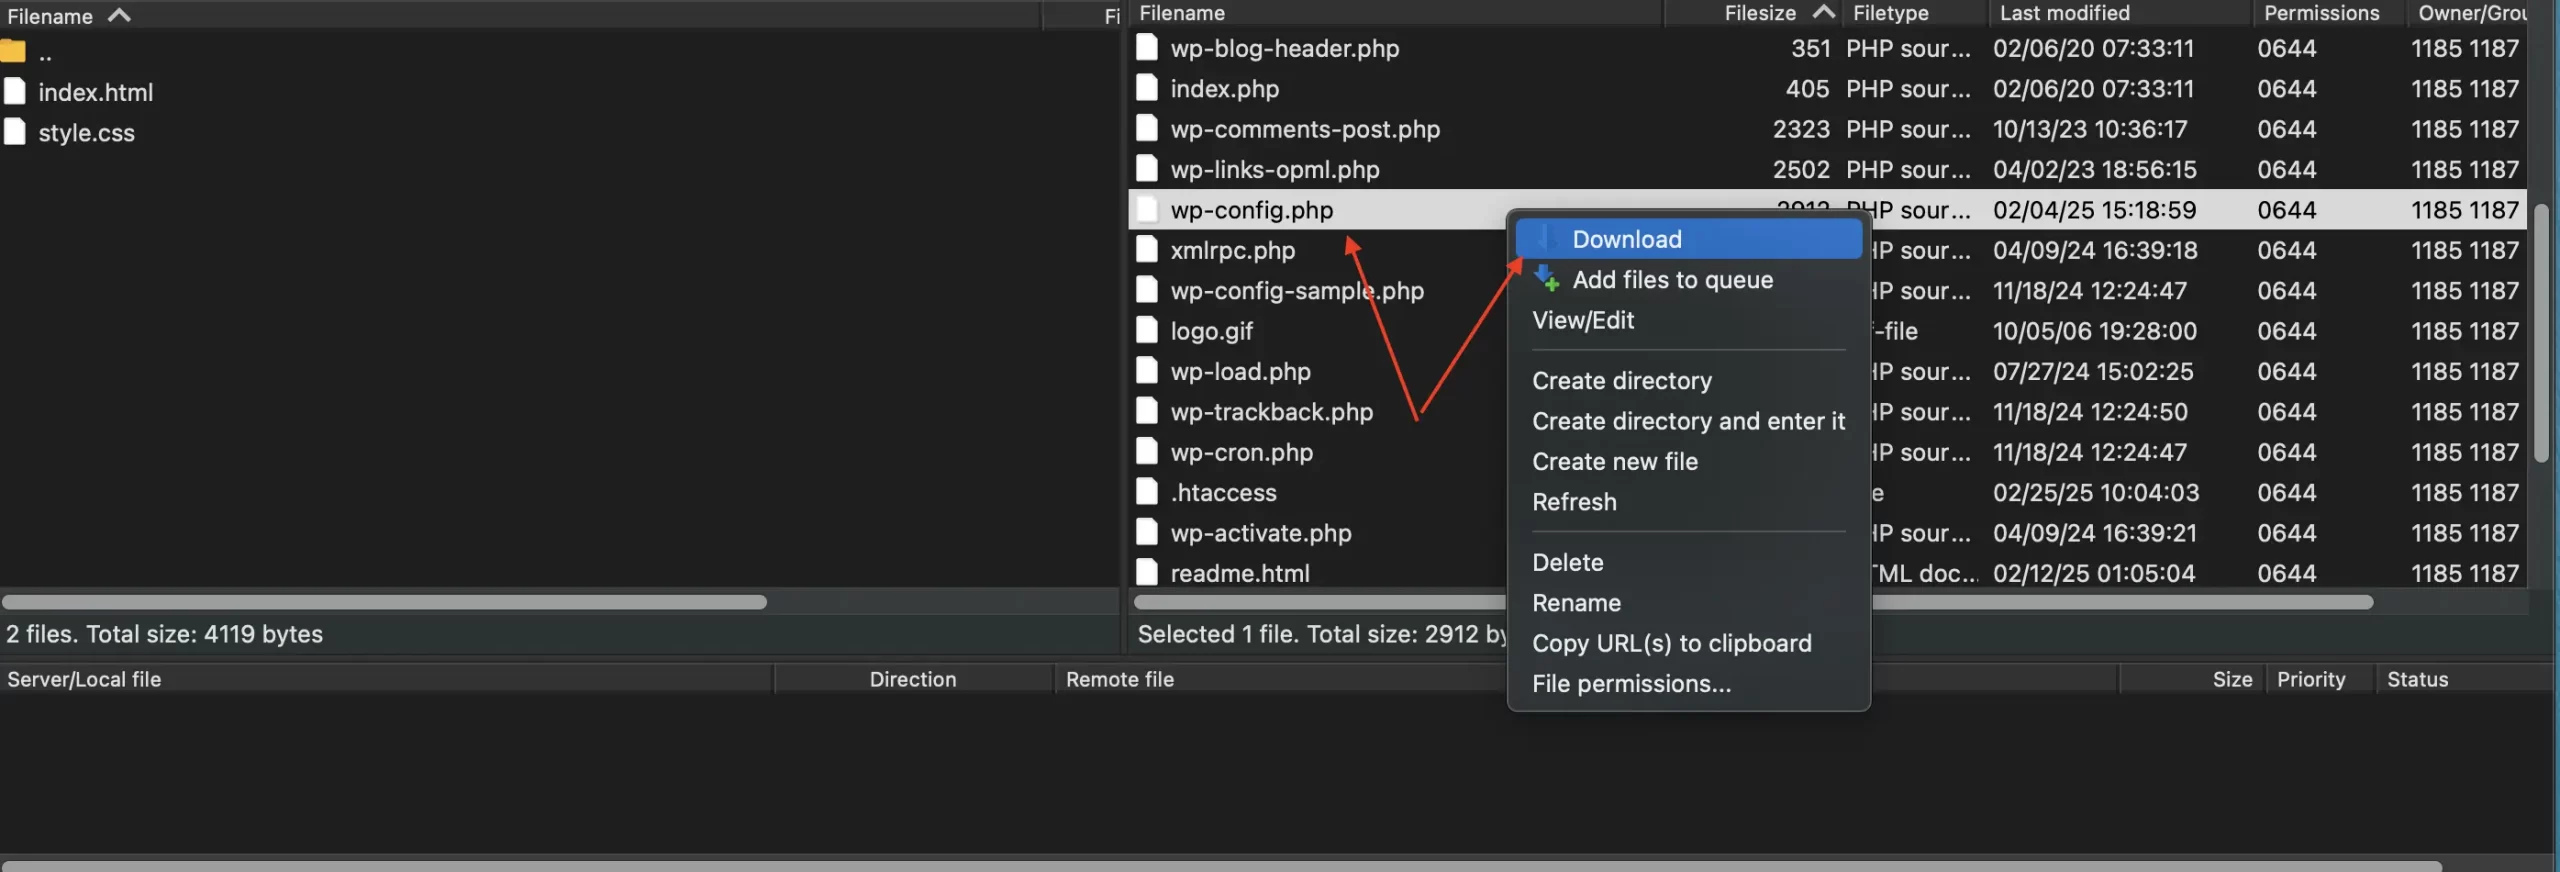
2. Backup Your wp-config.php File: This file is located in the root directory of your site. Before you edit it, it is essential to make a backup. Right-click the file and download a copy to your computer.
3. Edit the File: Open the wp-config.php file using a plain text editor.
4. Copy the Code Snippet: Copy the following line of code:
define( ‘WP_MEMORY_LIMIT’, ‘512M’ );
5. Paste the Code: Paste this line into the file just before the line that reads: /* That’s all, stop editing! Happy publishing. */.
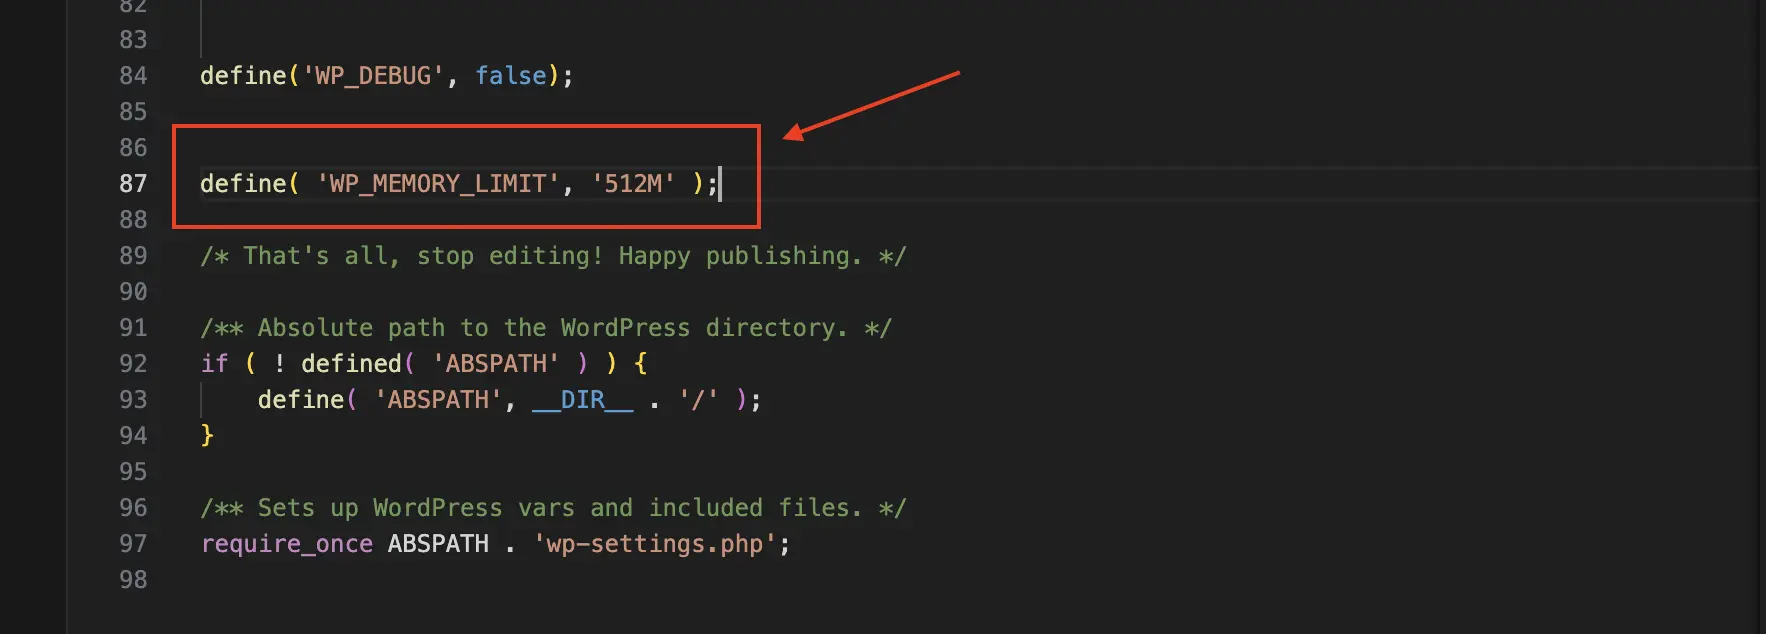
6. Save and Upload: Save your changes and upload the modified wp-config.php file back to your server, overwriting the existing one.
9. Check for a Database Connection Error
Seeing a page that says “Error Establishing a Database Connection?” The problem is just as straightforward as the message: your website can no longer talk to its database.
How to Verify Your Database Credentials
Step 1: Find Your Current Credentials in wp-config.php
1. Connect to your site’s server via FTP or File Manager.
2. Open your wp-config.php file from the root directory.
3. Look for the following lines of code. Your credentials are the values in the second set of quotes on each line.
define( ‘DB_NAME’, ‘your_database_name’ );
define( ‘DB_USER’, ‘your_database_username’ );
define( ‘DB_PASSWORD’, ‘your_password’ );
define( ‘DB_HOST’, ‘localhost’ ); // This value can sometimes be different.

4. Keep this file open for reference.
Step 2: Find Your Correct Credentials in Your Hosting Panel
1. Log in to your hosting account’s control panel (cPanel, Plesk, etc.).
2. Navigate to the “Databases” section. Look for a section or icon labeled “MySQL Databases.”

3. On this page, your hosting provider will list your existing databases. Find the database associated with your WordPress site.
4. Here, you will be able to see the correct Database Name and the Database User assigned to it.
5. Carefully compare these values to what you see in your wp-config.php file. If they don’t match, update the DB_NAME and DB_USER values in wp-config.php with the correct ones.
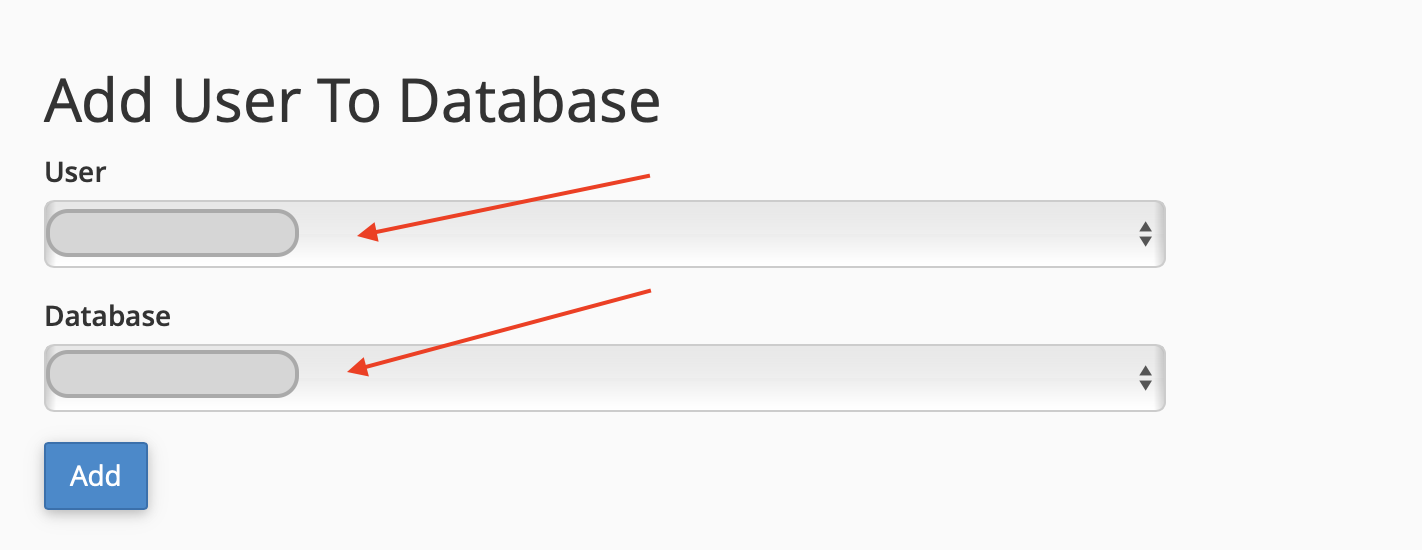
6. The DB_HOST is usually localhost, but some hosts (like WPEngine, Flywheel, SiteGround) use a specific server address. Check your host’s documentation or support if you’re unsure.
7. To fix a suspected password issue, simply use the “Reset Password” option for that user, which you’ll find right here in your hosting panel. Create a new password here, then copy and paste it into the DB_PASSWORD field in your wp-config.php file.
How to Prevent Future WordPress Login Issues
Use Strong Passwords & a Password Manager
- The single biggest step you can take is to use complex, unique passwords for your WordPress admin, hosting account, and database. A password like P@ssword123! is no longer enough. Use a random combination of upper/lowercase letters, numbers, and symbols.
This frees you from having to remember dozens of complex passwords. A tool like Bitwarden or 1Password does the hard work of generating and storing them, leaving you with just one master password to know.
Enable Two-Factor Authentication (2FA)
- 2FA adds a powerful second layer of security by requiring a time-sensitive code from your phone in addition to your password. This means that even if a hacker steals your password, they still can’t get in.
Many security plugins, including Wordfence, Solid Security (formerly iThemes Security), and Jetpack, offer robust 2FA features that are easy to set up.
Limit Login Attempts
- By default, WordPress lets users try to log in an unlimited number of times. This opens the door to “brute-force attacks,” where bots automatically try thousands of password combinations. You can stop this by installing a security plugin that limits login attempts.
The plugin will automatically block any IP address after a set number of failed logins (e.g., 5 attempts). This temporary lockout effectively stops the brute-force attack cold.
Maintain Regular, Automated Backups
- Sometimes, despite your best efforts, things go wrong. A regular backup is your ultimate safety net. It allows you to restore your site to a working state in minutes, completely bypassing the problem.
Don’t rely on manual backups you might forget to make. Your best bet is to set up automated backups. You have two excellent options:
1. Use a trusted plugin like UpdraftPlus.
2. Choose a hosting provider that offers daily, one-click restores.
Conclusion
Being locked out of your WordPress site is a stressful experience, but as you’ve seen, it’s rarely a permanent problem.
FAQ
Why is my wp-admin page redirecting or refreshing?
Both problems prevent WordPress from correctly identifying where to send you after you log in. To fix it, you’ll need to either reset your .htaccess file or define your site URLs in your wp-config.php file.
How do I log into WordPress if I forgot my username?
To find your username, access the wp_users table in phpMyAdmin and look for your details in the user_login column.
What is the WordPress White Screen of Death?
The best way to troubleshoot it is by disabling your plugins and theme via FTP and, if that fails, increasing your PHP memory limit.

