Dealing with constant spam comments? Noticing strange login attempts from an unknown source? Learning how to block IP addresses in WordPress is your first and most powerful line of defense. This action stops a specific user or bot from accessing your website entirely.
Think of it as a digital bouncer for your site. Whether you need a simple wordpress ip blocker for a single spammer or want to create a wordpress blacklist ip to stop a more serious threat, we’ve got you covered.
But simply blocking one IP isn’t always a permanent fix. This guide is different. We will show you the three most effective methods to keep your site safe.
We’ll explain when to use each one. And we’ll share expert-level strategies for long-term security.

TL;DR: The 3 Best Ways to Block IP Addresses in WordPress
Here are the three main ways to block an IP address in WordPress, ordered from easiest to most advanced.
Why You Need to Block IP Addresses in WordPress
Before we get to the “how,” let’s quickly cover the “why.” Knowing when to block an IP is just as important as knowing how to do it. Blocking an IP is a targeted solution for specific, annoying, and sometimes dangerous problems that show clear patterns.
To Stop Comment Spam
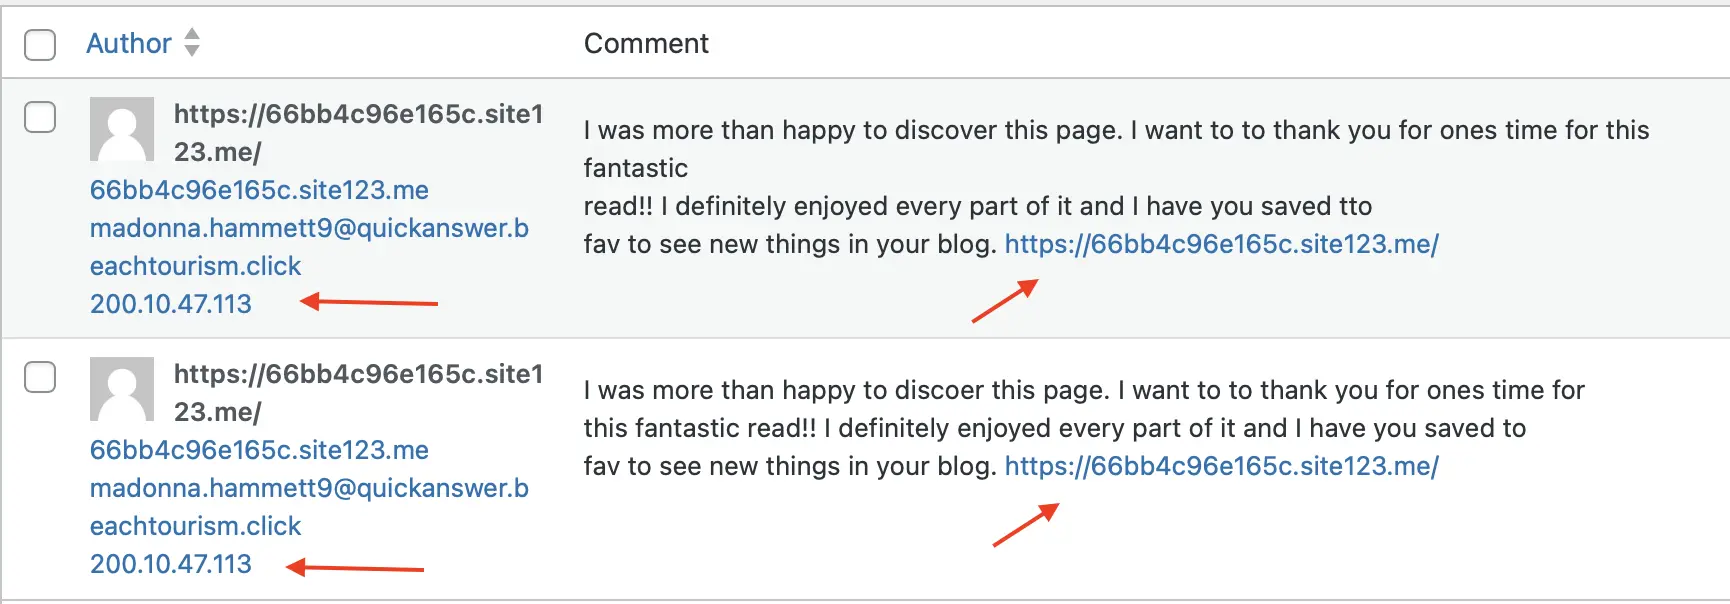
Are you tired of seeing the same nonsensical comment with a suspicious link appearing over and over? This is often the work of a single person or a simple spam bot.
- What to look for: In your WordPress Comments section, check the IP address next to the spam. If you see multiple spam comments all coming from the exact same IP, you have a perfect candidate for a block. Blocking this single IP can instantly clean up your comments section.
To Prevent Brute Force Attacks
A brute force attack is when a bot or hacker repeatedly tries to guess your username and password to gain access to your site. Think of it as a digital burglar trying every key on their keychain to open your admin door.
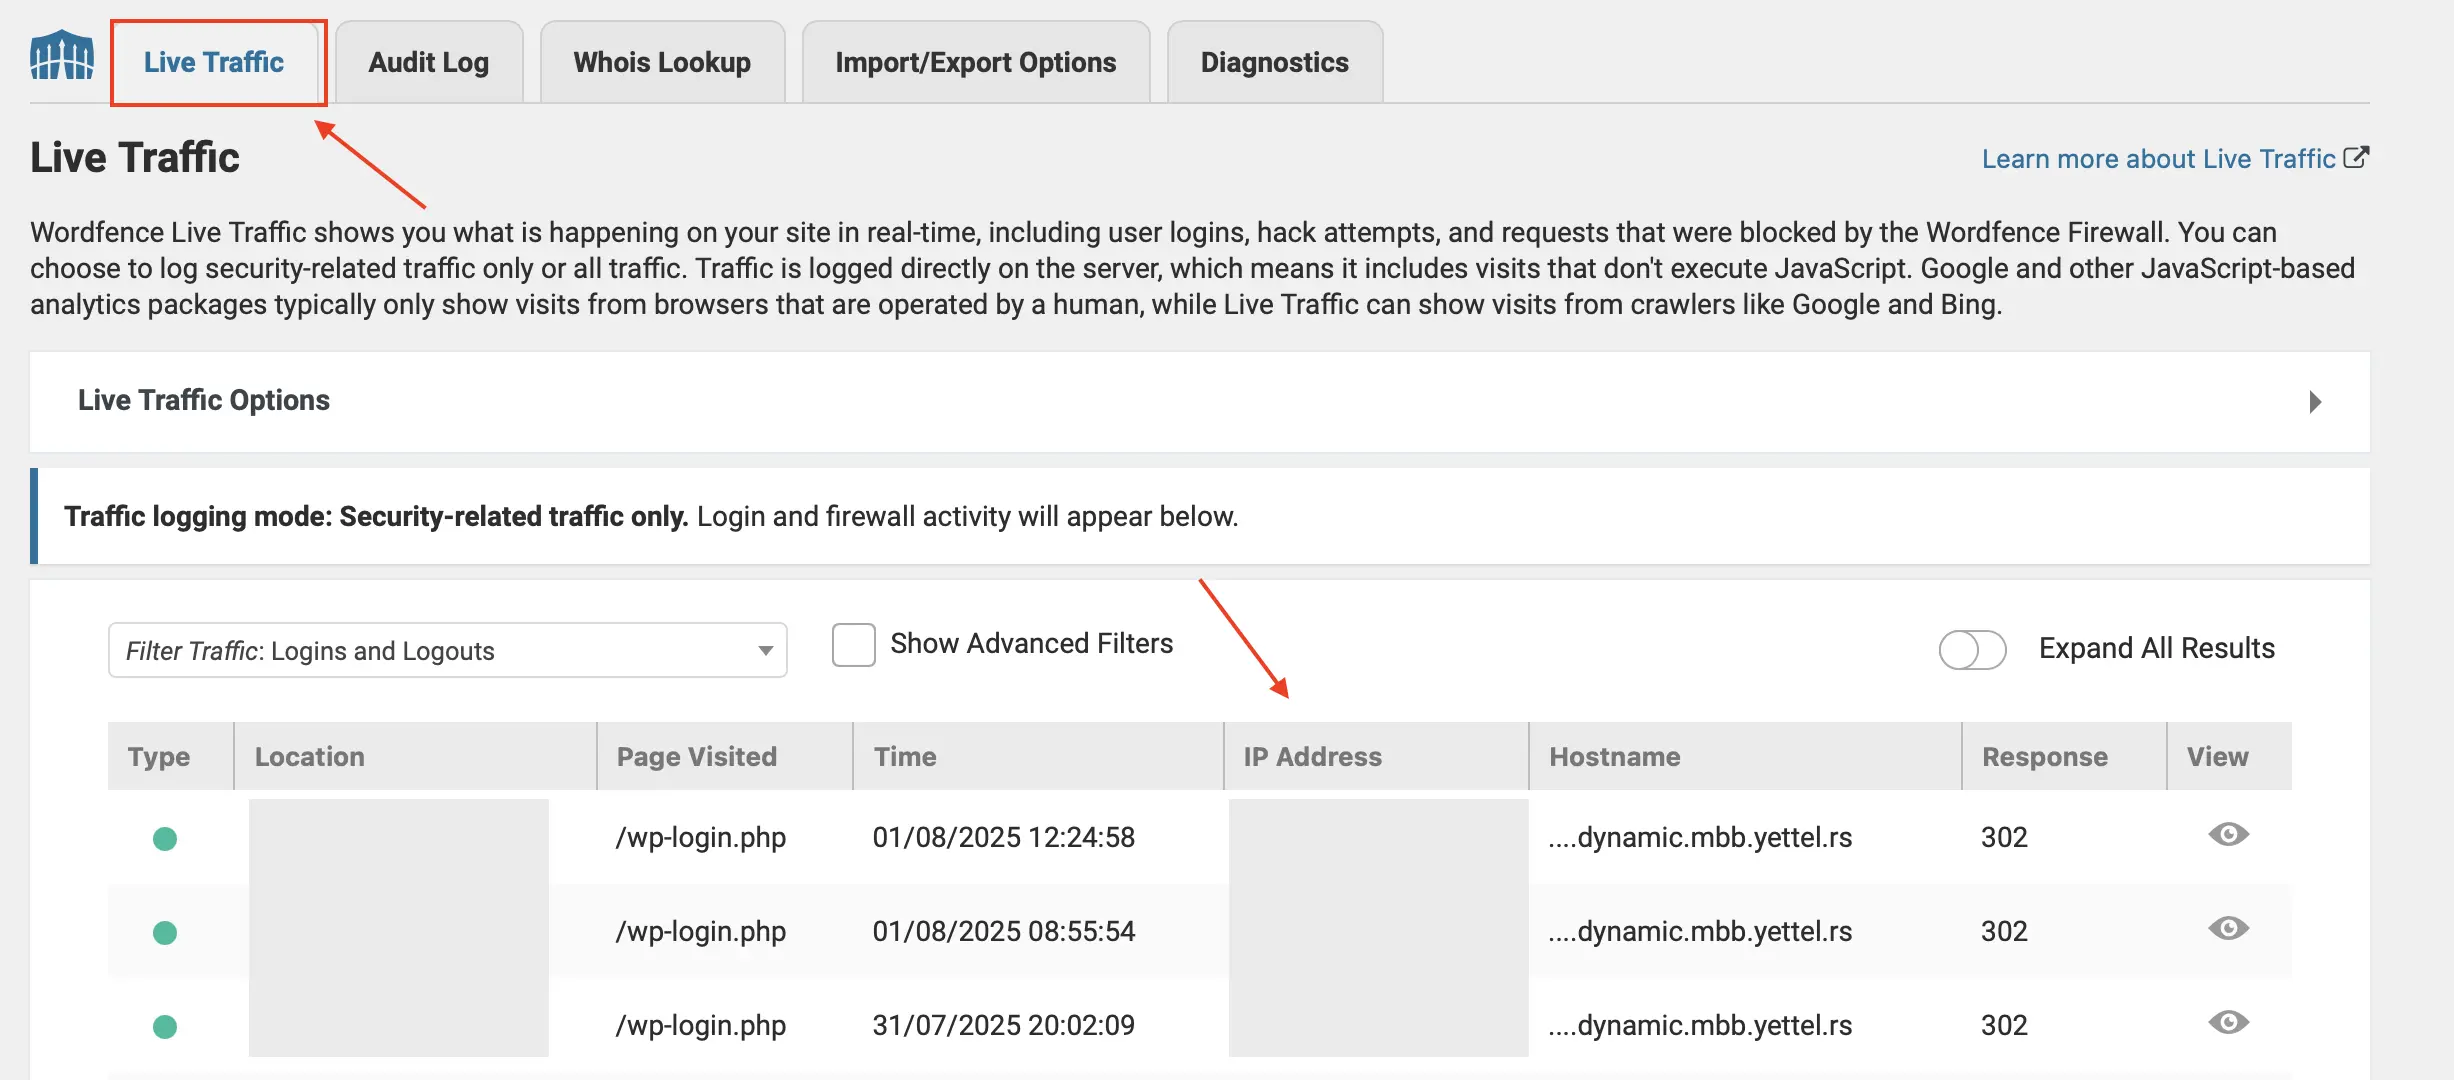
- What to look for: If you use a security plugin like Wordfence, check its “Live Traffic” or “Login Attempts” log. If you see dozens or hundreds of “failed login attempts” from a single IP address in a short period, you are under attack. Blocking the attacker’s IP stops them cold.
To Stop Malicious Bots and Scrapers
Not all bots are bad (like Google’s), but many are. Malicious bots cause two main problems:
1. Content Scrapers: These bots steal your articles and images to post on other websites.
2. Vulnerability Scanners: These bots probe your site for weaknesses in your plugins or themes that they can exploit.
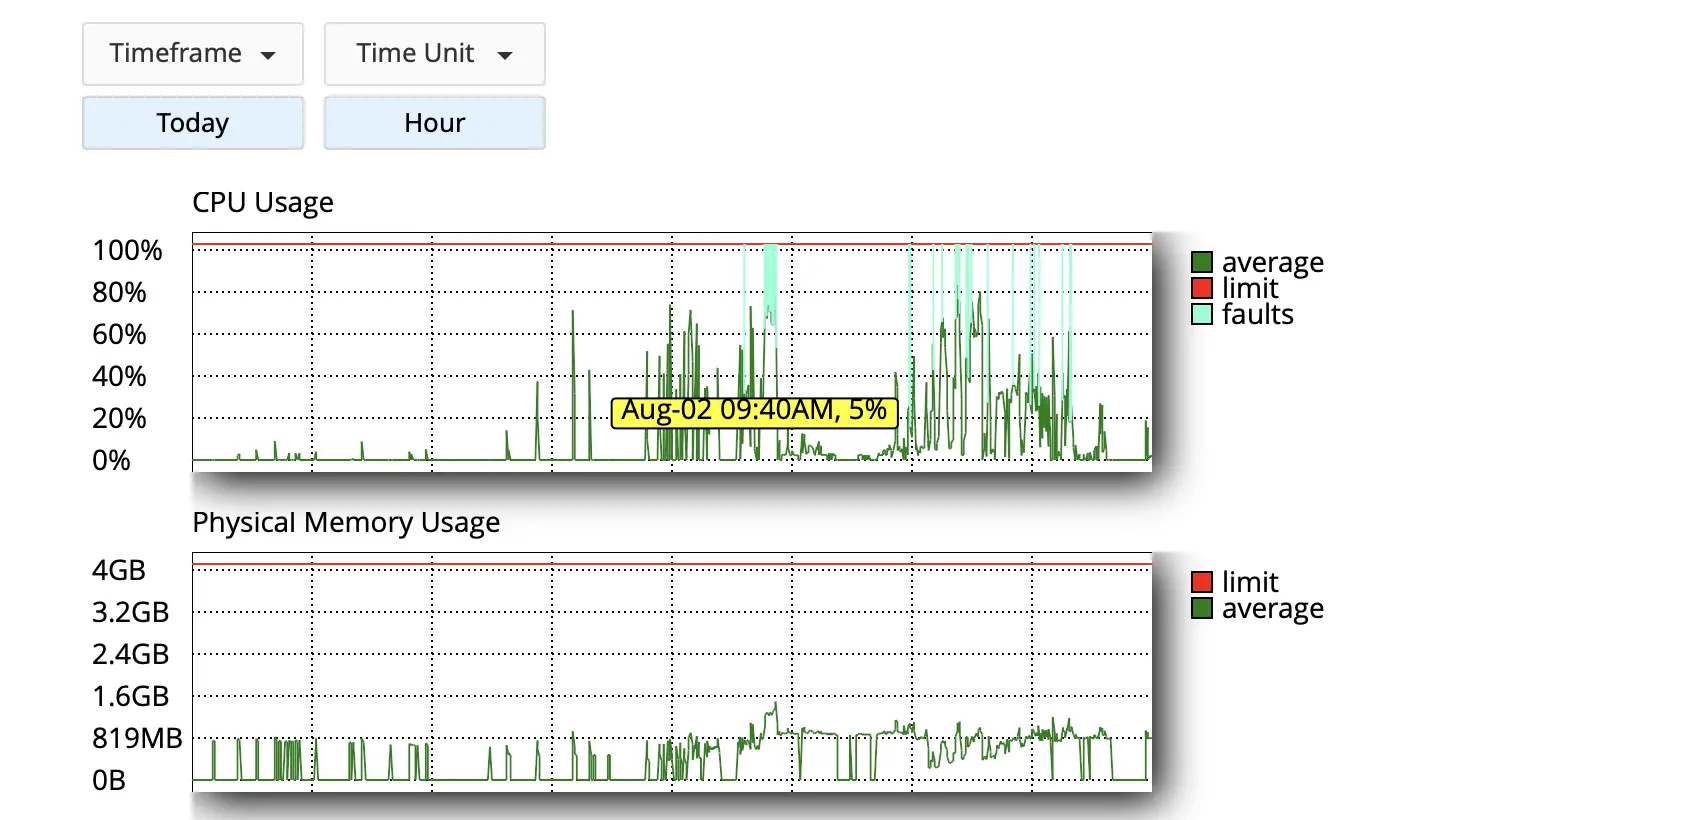
- What to look for: These activities can cause a sudden spike in your server resource usage. You might notice your site slowing down. Checking your server logs or security plugin traffic will reveal a single IP making an unusually high number of requests per minute. Blocking it protects your content and your server’s health.
Find the IP You Need to Block in WordPress
You can’t block an unwanted visitor if you don’t know their digital address. Finding the correct IP is the most important first step. Luckily, WordPress gives you a few ways to play detective.
We’ll start with the easiest method and move to the more advanced ones.
Finding IPs in WordPress Comments
1. From your WordPress dashboard, go to the Comments section.
2. Look for the spam comments. The IP address of the person who left the comment is listed right in the “Author” column.
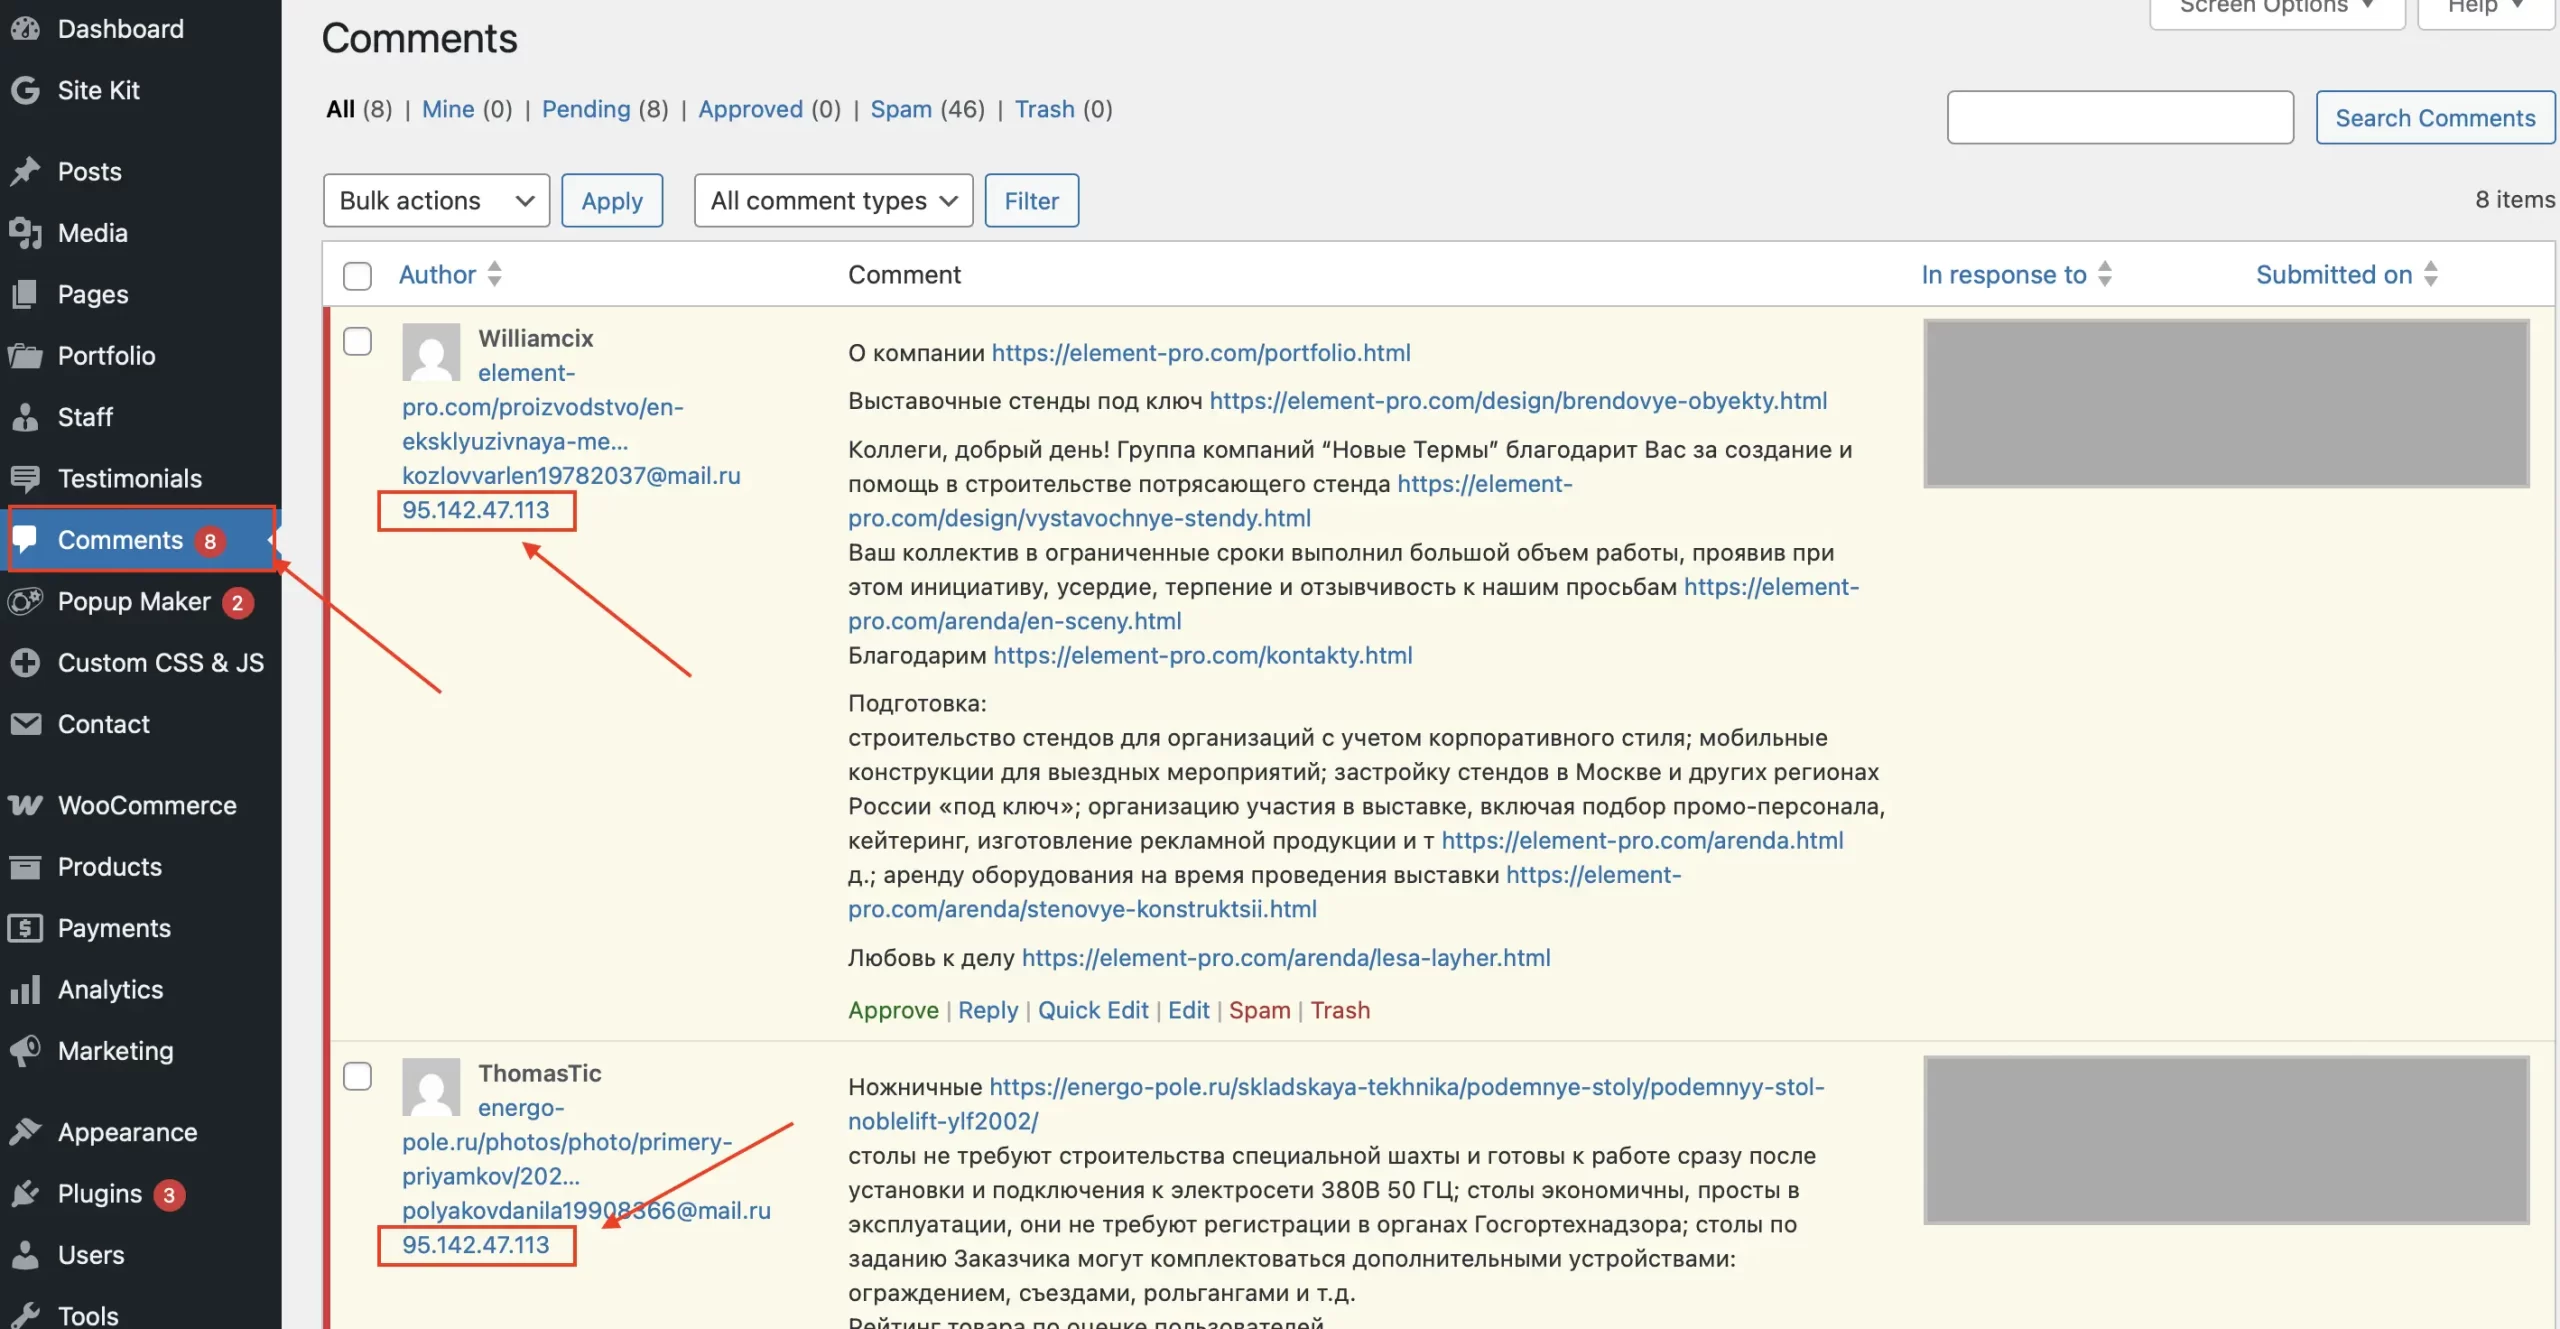
Pro Tip: Before you block it, check if the same IP address appears on multiple spam comments. This confirms you have the right target and aren’t just blocking a random person. Once confirmed, you have the exact IP you need for your wordpress blacklist ip.
Use the Built-in Comment Blacklist
1. From your dashboard, navigate to Settings > Discussion.
2. Scroll down until you see a text box labeled “Disallowed Comment Keys.”
3. Paste the spammer’s IP address into this box. If you want to add more than one, put each IP on its own line.
4. Scroll to the bottom of the page and click “Save Changes.”

Expert Analysis: Why This Method Is Not Enough for Security
It is crucial to understand that the “Disallowed Comment Keys” feature only stops that IP from successfully posting comments.
It does NOT block them from visiting your site, scraping your content, or trying to hack your login page. It’s a tool for spam management, not a true security wordpress ip blocker.
For real protection that bans the user from your entire website, you must use one of the powerful methods below.
Using a Security Plugin’s Live Traffic Log
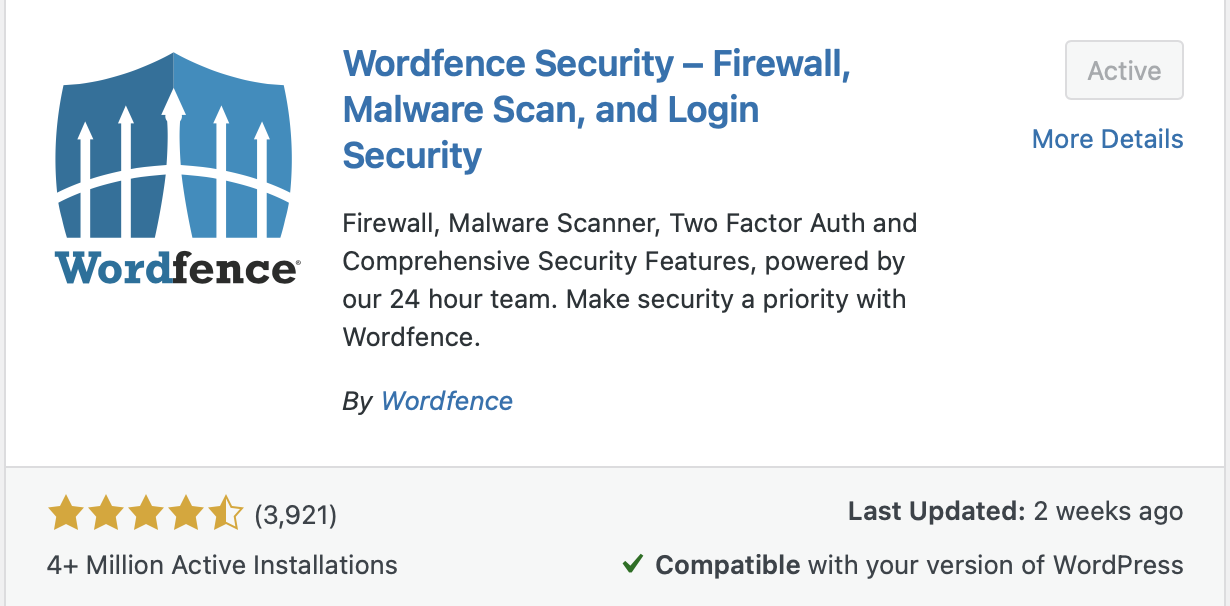
1. Install and activate your security plugin.
2. Find the Live Traffic or Firewall section (in Wordfence, it’s under Wordfence > Live Traffic).
3. This log shows you every visitor on your site in real-time, including their IP address, their location, and what pages they are viewing.
Checking Your Server’s Access Logs (The Advanced Way)
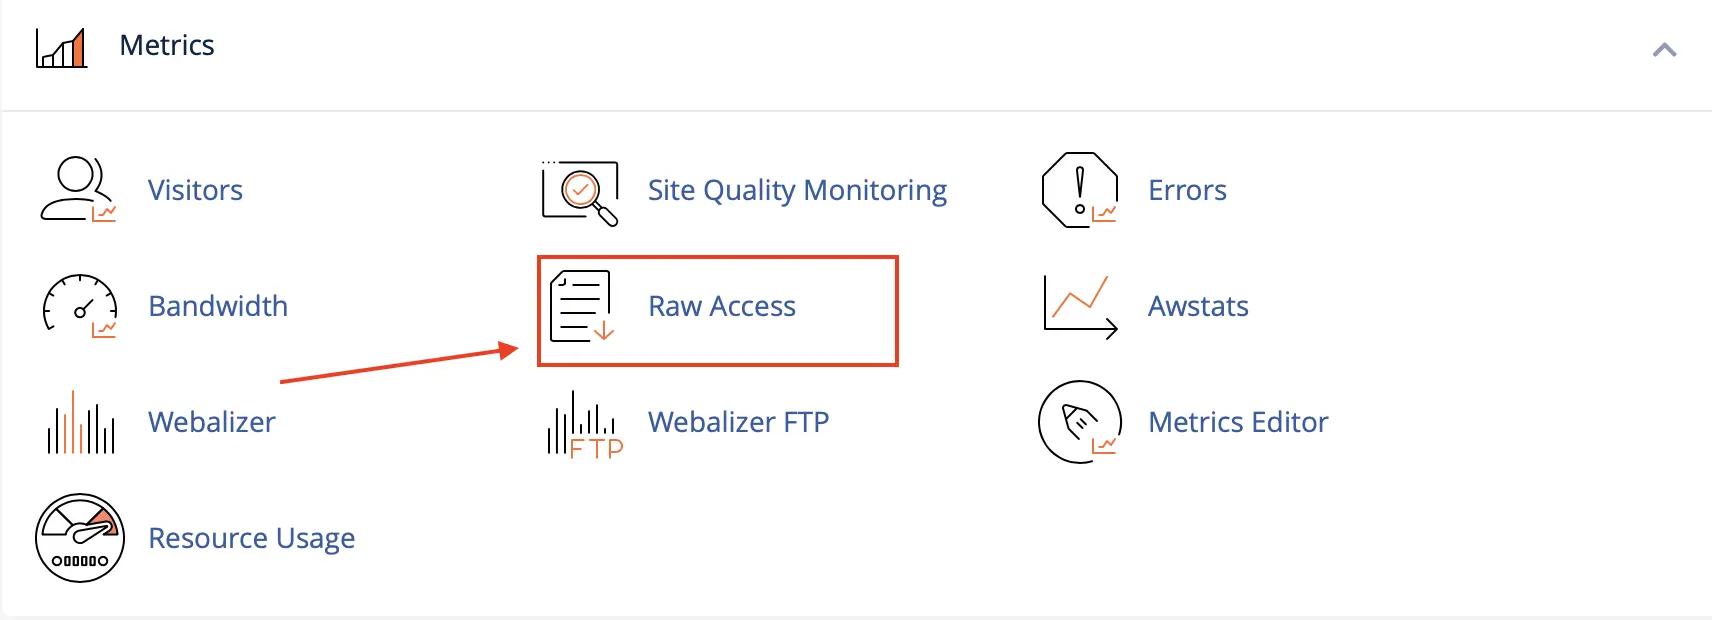
1. Log in to your hosting account’s cPanel.
2. Look for an icon called “Raw Access” or “Access Logs.”
3. Download the log file for your domain. It will be a large text file.

Now, Choose Your Method to Block the IP
- For beginners or those who want a simple, user-friendly interface, the Plugin Method is best.
- For better performance and a more efficient block, the cPanel Method is the superior choice.
- For developers or power users who want maximum control, the .htaccess Method is the most powerful.
Method 1: Block IPs with a WordPress Plugin (The Easy Way)
Using a security plugin like Wordfence (which has a powerful free version) lets you manage everything from your WordPress dashboard. You don’t need to touch any code.
Why Choose This Method?
- User-Friendly: You get a simple interface with buttons and fields.
- All-in-One Security: Wordfence does much more than just IP blocking, giving you a firewall, malware scanner, and more.
- No Code Needed: You don’t risk breaking your site by editing sensitive files.
Step-by-Step Guide:
1. Install & Activate Wordfence: From your WordPress dashboard, go to Plugins > Add New, search for “Wordfence,” and then install and activate it.
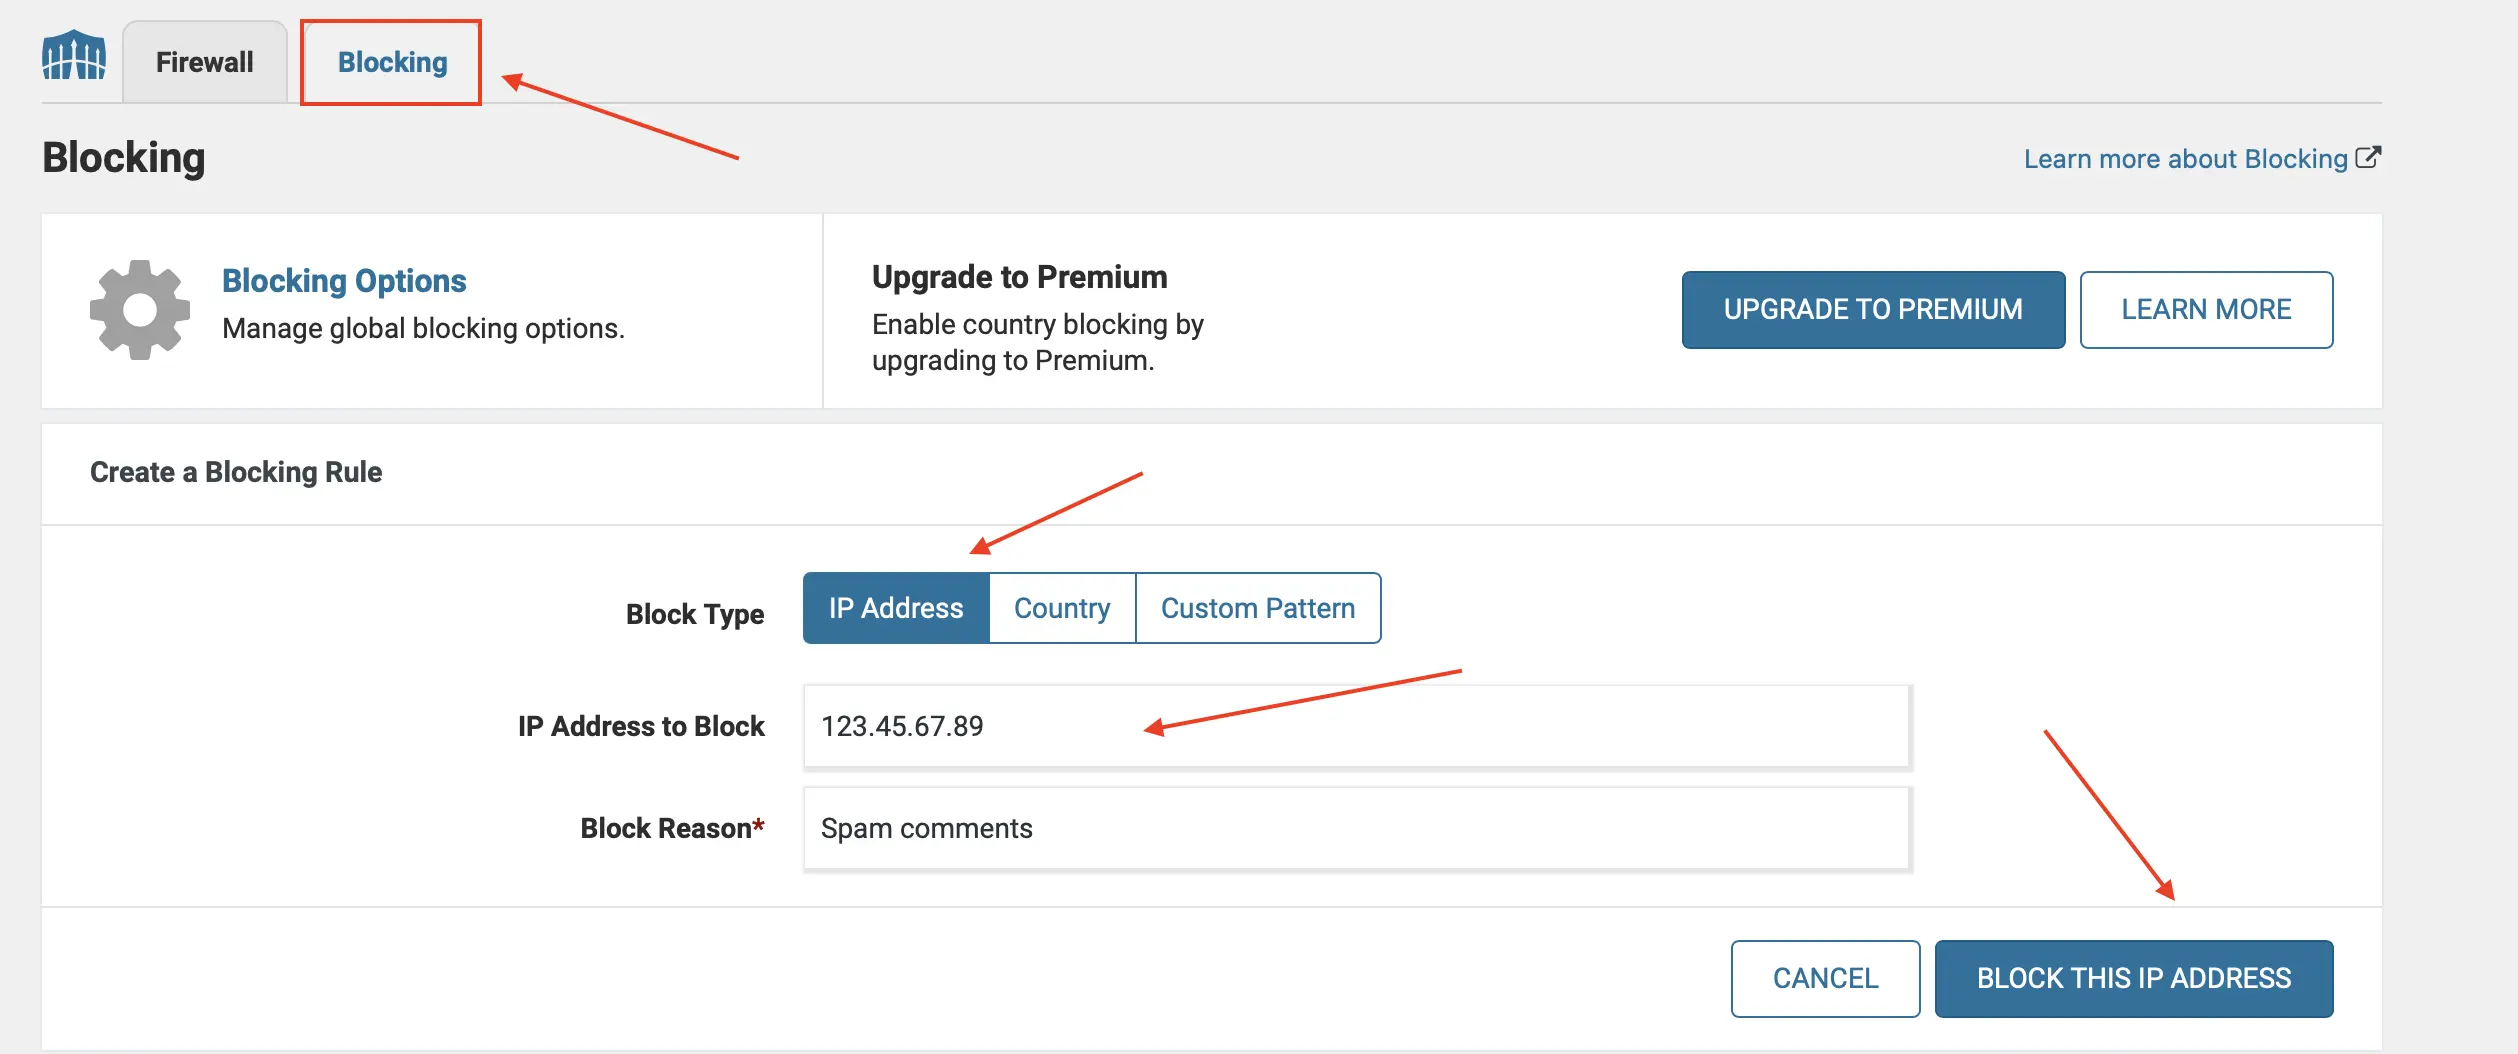
2. Navigate to the Firewall: In your dashboard menu, go to Wordfence > Firewall.
3. Go to the Blocking Tab: At the top of the Firewall page, click on the “Blocking” tab.
4. Enter the IP and Block:
- In the “Block Type” dropdown, make sure “IP Address” is selected.
- Enter the IP address you want to block in the text field.
- You can add a “Block Reason” to help you remember why you blocked this IP later.
- Click the big blue “Block This IP Address” button.
Method 2: Use cPanel to Block an IP (The Efficient Way)
If you want a more efficient way to block IP addresses in WordPress, consider using your hosting account’s cPanel. This method is better for performance. It stops malicious traffic before it reaches your WordPress site, saving server resources.
Why Choose This Method?
- Highly Efficient: Saves server resources since WordPress doesn’t have to process the request.
- Site-Wide Protection: If you have multiple sites on the same hosting account, this can block the IP from all of them.
- Independent of WordPress: It works even if your WordPress site is having issues.
Step-by-Step Guide:
1. Log in to cPanel: Log in to your website’s hosting account and open cPanel.
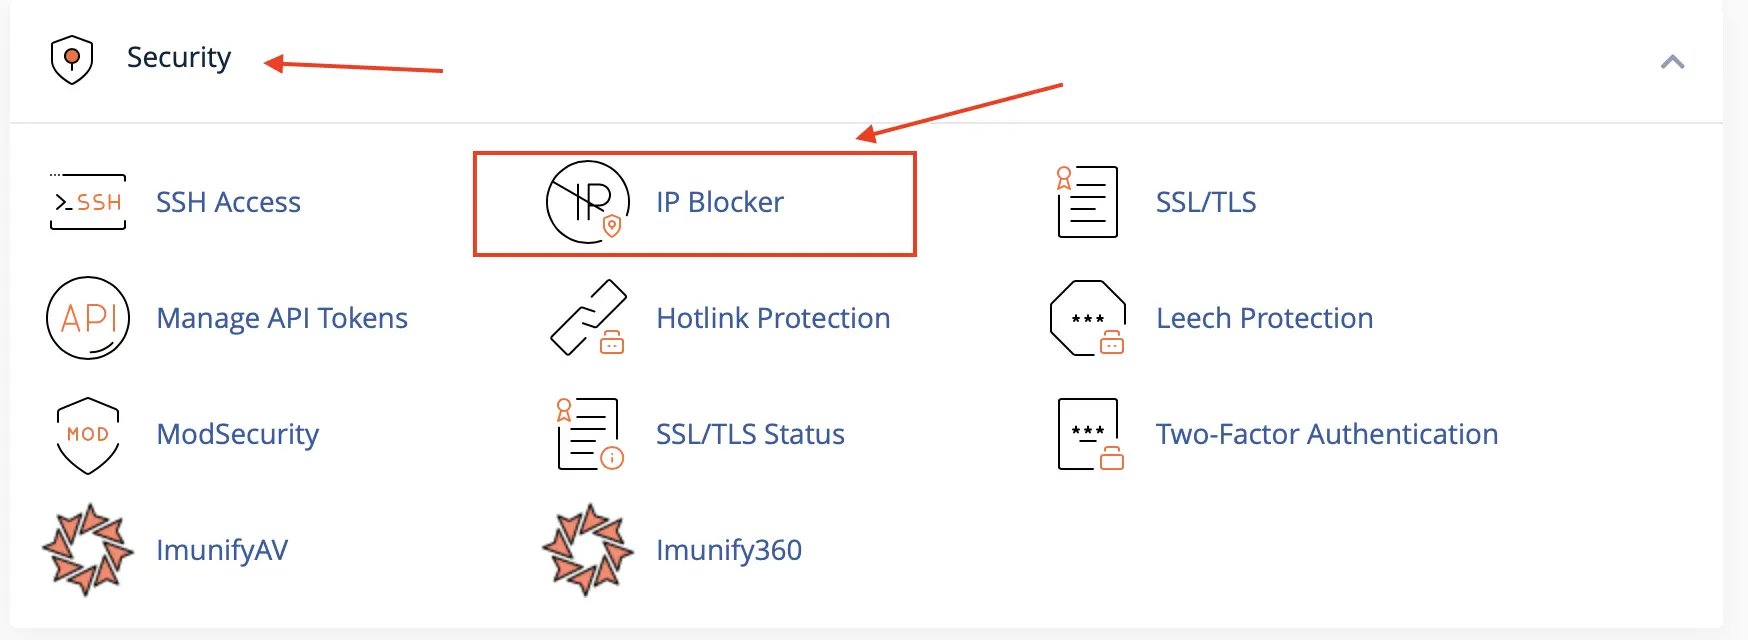
2. Find the IP Blocker: Scroll down to the “Security” section and click on the “IP Blocker” icon.
3. Add the IP Address: In the “Add an IP or Range” field, type or paste the IP address you want to ban.

4. Confirm the Block: Click the “Add” button. The IP will be instantly added to your server’s blocklist.
Method 3: Advanced IP Blocking with .htaccess (The Power User Way)
Warning: This is an advanced method. A small mistake or typo in your .htaccess file can take your entire website offline. Always make a backup of this file before you edit it.

Why Choose This Method?
- Maximum Control: You can write complex rules to block multiple IPs, ranges, and more.
- Extremely Fast: The block is handled by the server at the earliest possible stage.
- No Plugin Needed: A lightweight solution for those who avoid adding extra plugins.
Step-by-Step Guide:
1. IMPORTANT: Back Up Your .htaccess File! Using an FTP client or your cPanel File Manager, find the .htaccess file in the root directory of your WordPress installation and download a copy to your computer.
2. Access and Edit the File: Open the .htaccess file in your File Manager’s editor or a plain text editor.
3. Add the Blocking Code: Add the following code snippet to the top of the file:
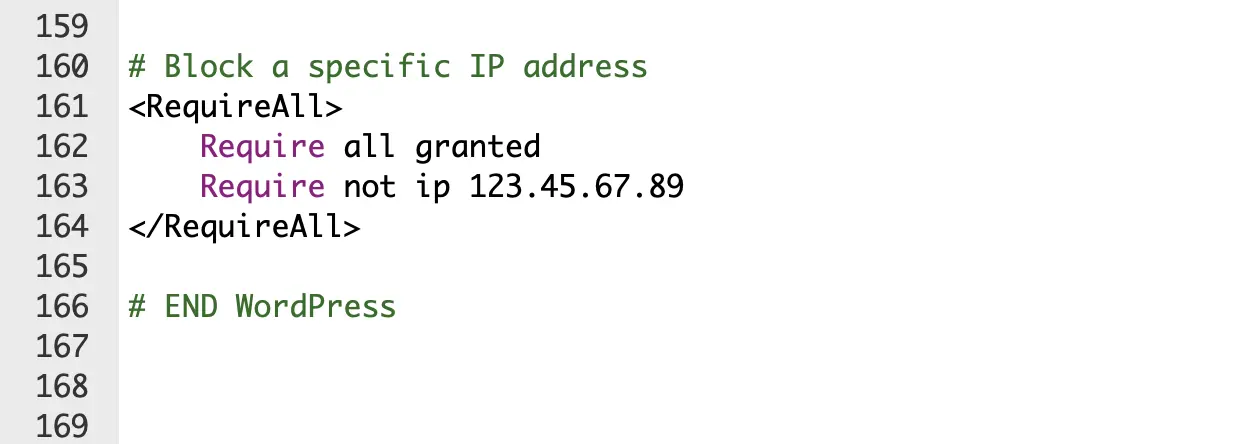
- Replace 123.45.67.89 with the actual IP you want to block.
- To block multiple IPs, just add more Require not ip lines:

4. Save the File: Save your changes and upload the file back to your server if you edited it offline. Test your website immediately to ensure it loads correctly.
Advanced IP Blocking: Block Entire Countries or Ranges in WordPress
How to Block an IP Range
- Using Wordfence (Easy): In the same Wordfence > Firewall > Blocking screen, you can enter an IP range directly. For example: 198.51.100.1 – 198.51.100.255. Wordfence will handle the rest.
- Using .htaccess (Advanced): You can block ranges using CIDR notation. This is more technical, but very powerful. For example, to block the entire 198.51.100.x range, you would add: Require not ip 198.51.100.0/24
Geoblocking: How and When to Block a Country
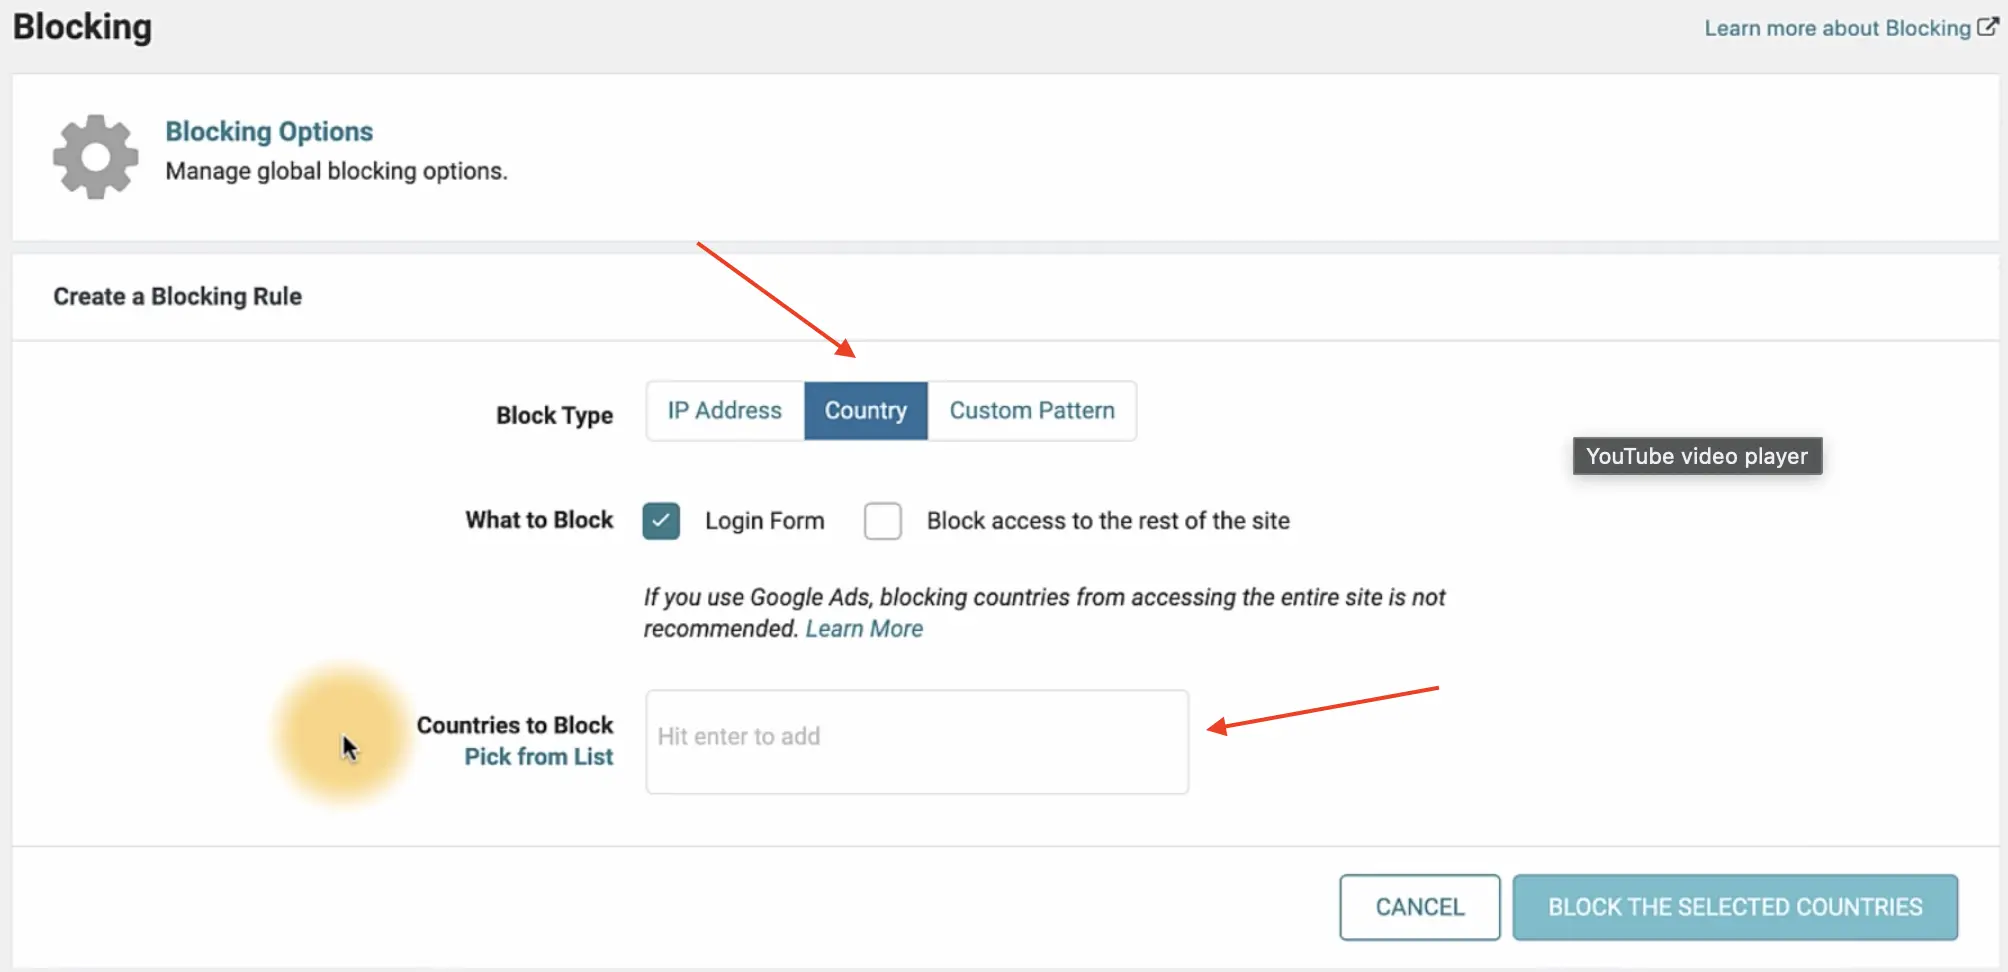
When should you do this? Only block a country if you are absolutely certain you don’t have any legitimate customers or visitors from that region.
How do you do it? The easiest way is with a premium security plugin. The paid version of Wordfence includes a feature to block countries with just a few clicks.
A Free Geoblocking Method: Using iQ Block Country
The iQ Block Country plugin is a free tool dedicated to this one task. Because of licensing rules, it can’t bundle the necessary IP database, so you have to download and upload it yourself.
1. Install and activate the iQ Block Country plugin
2. Download the GeoLite2 database
3. Upload the GeoLite2-Country.mmdb file to your WordPress directory. Usually /wp-content/uploads/GeoLite2-Country.mmdb
4. Choose countries to block in the plugin settings
4. Click “Save Changes.”
Expert Note: The Free vs. Premium Trade-Off
This manual process of downloading and uploading the database is the main difference between a free and a premium geoblocking solution.
The GeoLite2 database is updated periodically, so you will need to repeat Step 2 and 3 every few months to keep your blocklist accurate.
Premium services like Wordfence handle all of this automatically in the background, which is what you are paying for—convenience and hands-off maintenance.
Is Blocking an IP in WordPress Always the Best Solution? (Expert Analysis)
This is the most important question to ask. While learning to block IP addresses in WordPress is a vital skill, it is not a perfect, “set it and forget it” security solution.
The Major Weakness: Dynamic IPs and VPNs
- Dynamic IPs: Most home internet connections use dynamic IPs, which change every time a router is reset. You might block a spammer today, but they could be back with a new IP tomorrow.
- VPNs & Proxies: Attackers often use Virtual Private Networks (VPNs) or proxies to hide their real location. They can switch between hundreds of different IPs from all over the world, making manual blocking a frustrating and endless game of whack-a-mole.
The Superior Alternative: Using a Web Application Firewall (WAF)
For truly robust, modern security, you need a Web Application Firewall (WAF).
Think of it this way: Manually blocking IPs is like having a bouncer with a list of a few known troublemakers.
Services like Cloudflare (which has a fantastic free plan) or Sucuri act as a WAF. They filter all your website traffic through their secure network. This blocks millions of known malicious IPs, bots, and other attacks automatically.

Our Recommendation: For the best protection, use both. Use a WAF like Cloudflare as your first line of defense, and keep the ability to manually block ip address wordpress for any specific issues that might slip through.
Conclusion: A Smart Strategy to Block IP Addresses in WordPress
- Plugins like Wordfence offer the easiest and most user-friendly approach.
- cPanel’s IP Blocker provides a more efficient server-level block.
- Editing the .htaccess file gives you the ultimate power and control.
But remember the expert strategy: manual IP blocking is reactive. For proactive, world-class protection in 2025, layer these techniques with a Web Application Firewall (WAF) like Cloudflare.
FAQ: Blocking IP Addresses in WordPress
What is an IP address?
Why is IP blocking important for WordPress sites?
IP blocking is key for WordPress security. It stops spam comments and brute-force attacks. It also keeps out known threats.
How do I unblock an IP address I blocked in WordPress?
Simply reverse the process. Go to the tool you used (Wordfence, cPanel’s IP Blocker, or your .htaccess file) and remove the IP address from the blocklist.
What are the built-in methods for blocking IP addresses in WordPress?
WordPress has a comment blacklist in Settings > Discussion. It lets you block specific IP addresses from commenting. You can also use .htaccess rules by adding “Deny from [IP Address]” to the file.
What are some popular WordPress plugins for IP blocking and security?
Wordfence Security and All In One WP Security & Firewall are top plugins. They offer security features like IP blocking and firewall protection. These plugins help identify and block malicious IP addresses, saving time and boosting site security.
How can I block entire IP ranges or implement country-based IP blocking?
To block IP ranges, use the “Deny from” directive in .htaccess, like Deny from 123.123. For country-based blocking, use the iQ Block Country plugin. It restricts access by geographical location by downloading and installing the GeoLite2 database and selecting countries to block through the plugin settings.


